Build Workflow One
Connect the demonstrated Wazuh, Shuffle, TheHive, and response components. Validate each integration independently before enabling the complete chain.
Workflow One · enrich and create a case
- Goal
- Turn a Wazuh detection into enriched, reviewable case evidence.
- Input
- A synthetic rule 100200 alert containing file hashes.
- Output
- VirusTotal context, a TheHive alert and case, and an email.
- Checkpoint
- Every result refers to the same source alert and SHA-256.
Connect the response stack
Configure Wazuh
Configure Wazuh Windows Client
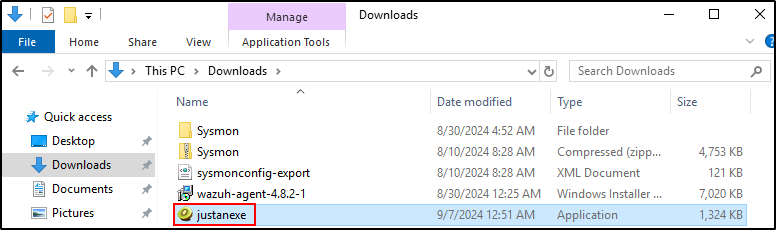
The original PoC added the Administrator Downloads folder to a Windows Security exclusion and executed Mimikatz to generate a recognisable alert. The original screenshots are retained below so the recorded workflow can still be understood.
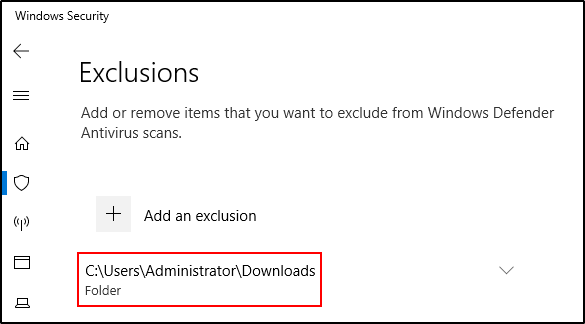
Advanced isolated reproduction only
Do not disable endpoint protection or download and execute Mimikatz for the beginner path. Mimikatz is a credential-access tool and may expose secrets, trigger containment, or create unsafe habits. Use the synthetic alert in the Shuffle Hands-on Labs to learn the workflow. Reproduce the original executable-based test only in a disposable, isolated, authorised environment with an agreed cleanup plan.
For an authorised advanced reproduction, follow your organisation's malware handling procedure and confirm the Windows endpoint contains no real credentials before generating the test event.
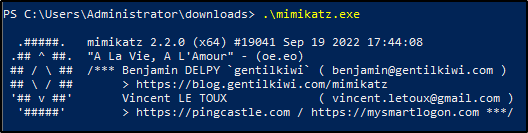
Configure Wazuh Manager
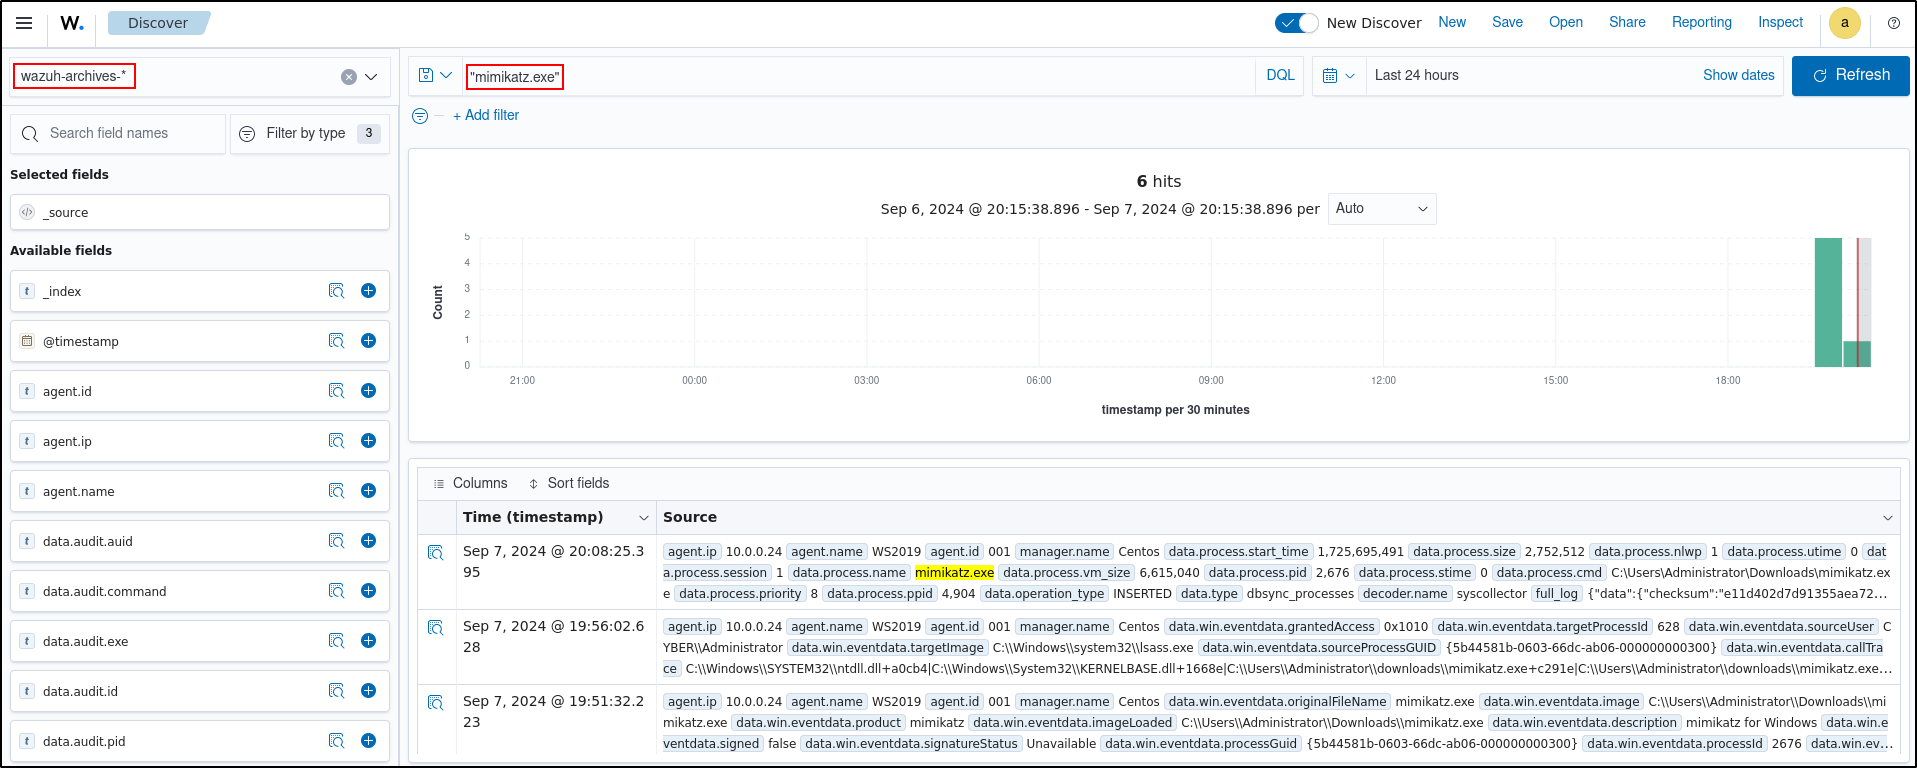
On Wazuh Manager, verify that there are entries related to Mimikatz in the archives file
Verify that searching for “mimikatz.exe” in wazuh-archive-* index returns a result
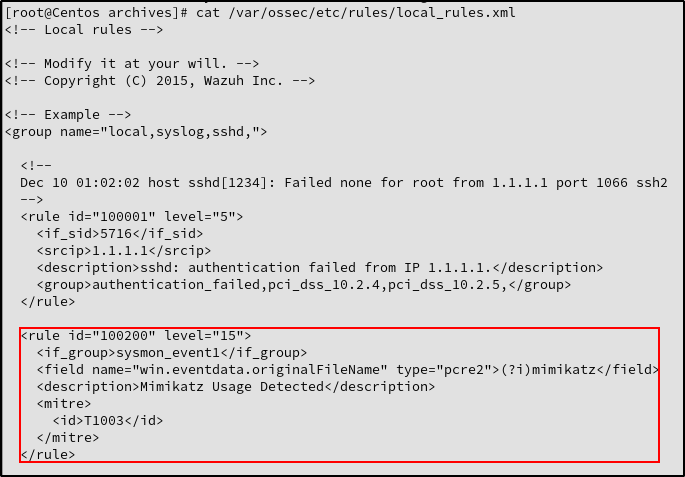
Add a custom rule in /var/ossec/etc/rules/local_rules.xml
Make sure indentation aligns with other rules
nano /var/ossec/etc/rules/local_rules.xml
<rule id="100200" level="15">
  <if_group>sysmon_event1</if_group>
  <field name="win.eventdata.originalFileName" type="pcre2">(?i)mimikatz</field>
  <description>Mimikatz Usage Detected</description>
  <mitre>
    <id>T1003</id>
  </mitre>
</rule>
Restart Wazuh Manager
Configure Windows Client
Rename mimikatz.exe to something else (e.g. justanexe)
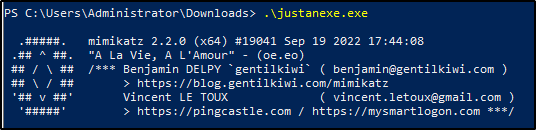
Open PowerShell as Administrator and execute mimikatz (justanexe)
Configure Wazuh Manager
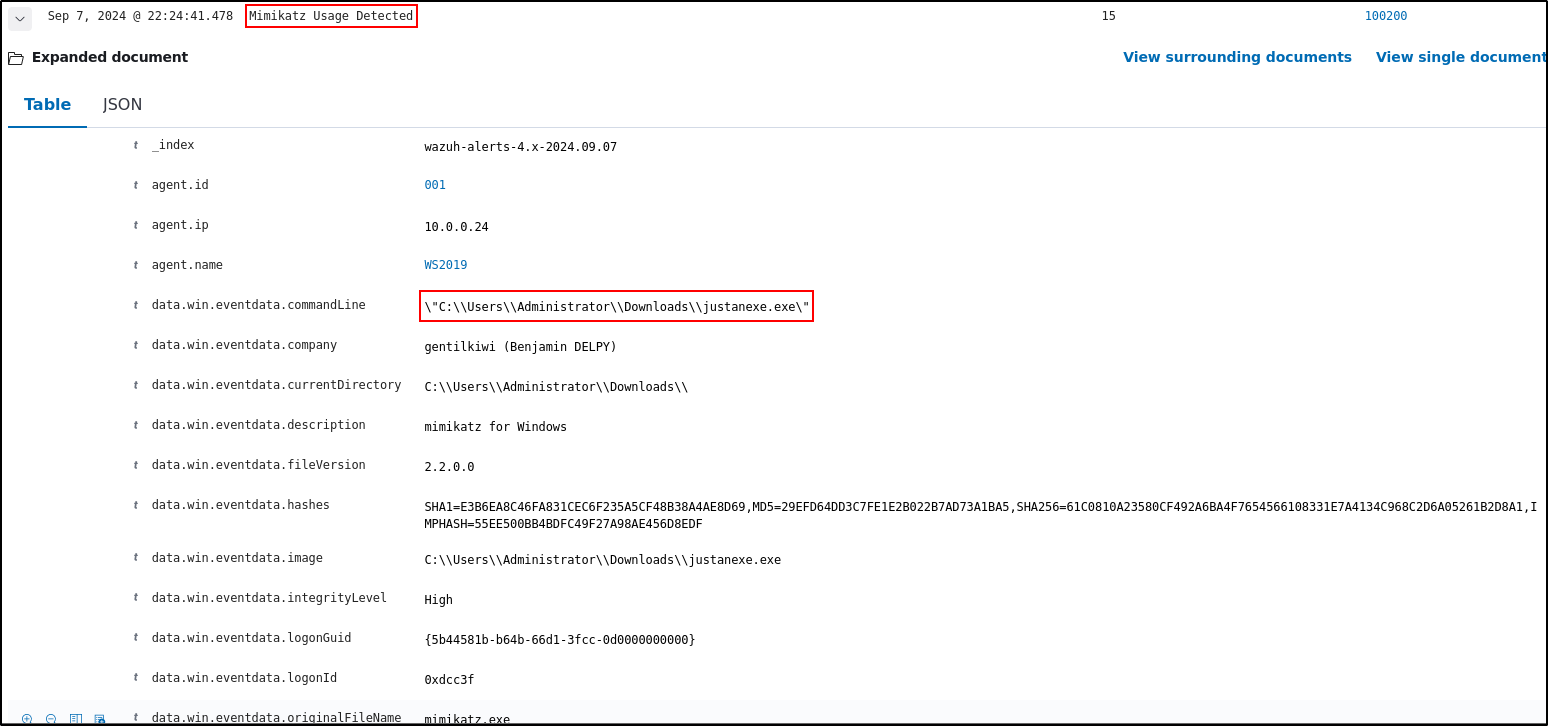
On Wazuh Manager, verify that there are entries related to ruld id 10020 Mimikatz Usage Detected
Configure Shuffle
Upload the required Apps
On a machine with internet connection:
Search for Wazuh, TheHive and VirusTotal in https://shuffler.io/search
Download the OpenAPIs (JSON file)

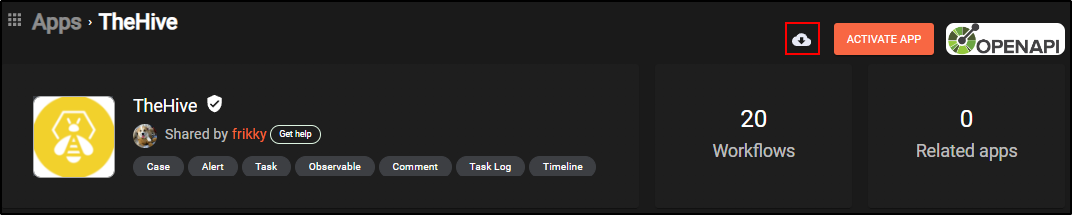

Transfer the JSON files to the air-gapped environement.
Navigate to Shuffle web UI and into Apps.
Select Generate from Open API
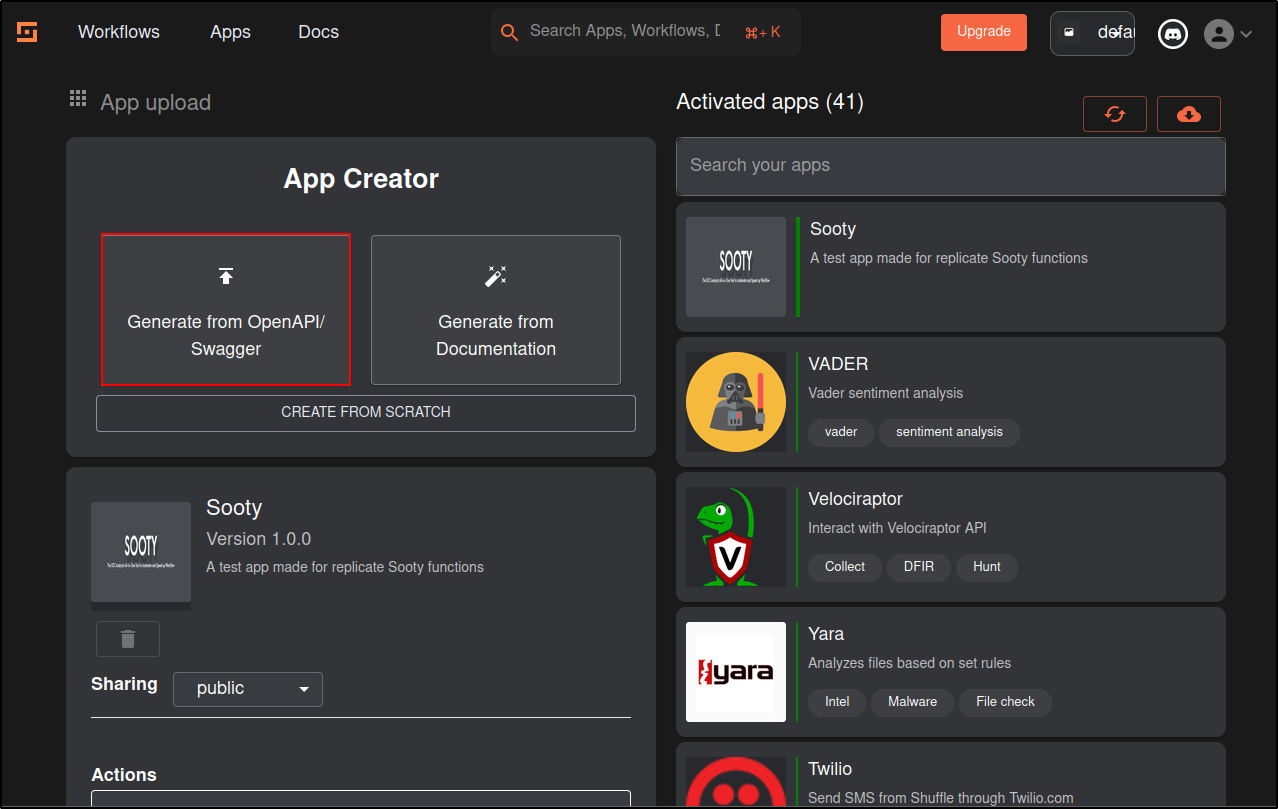
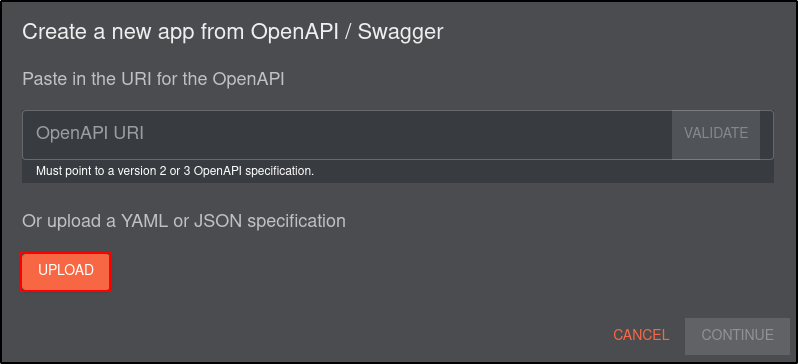
Upload the Wazuh JSON file
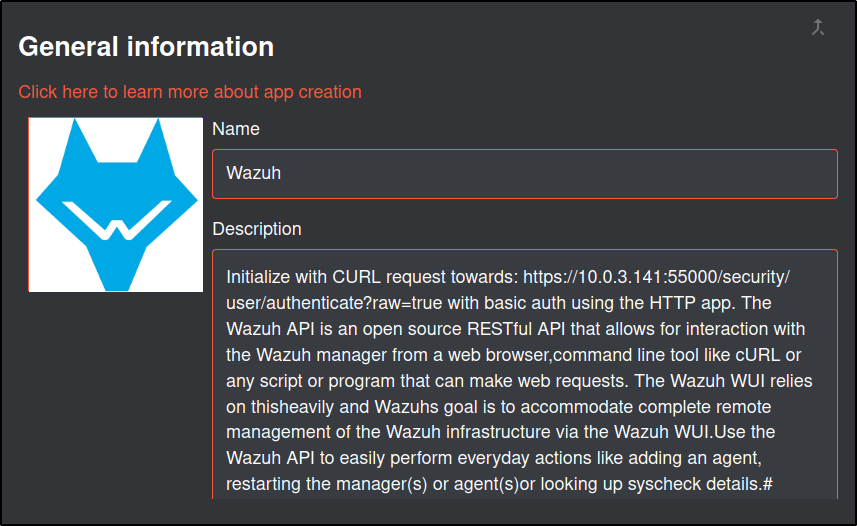
Scroll to the bottom and click save.
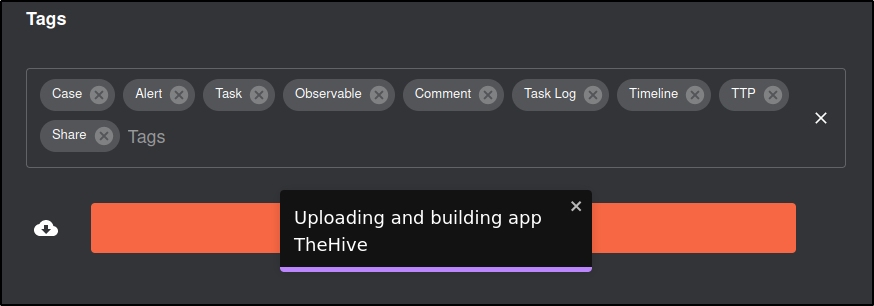
Repeat the same proccess for TheHive
Verify that Wazuh, TheHive and Virustotal appear in the Activated Apps
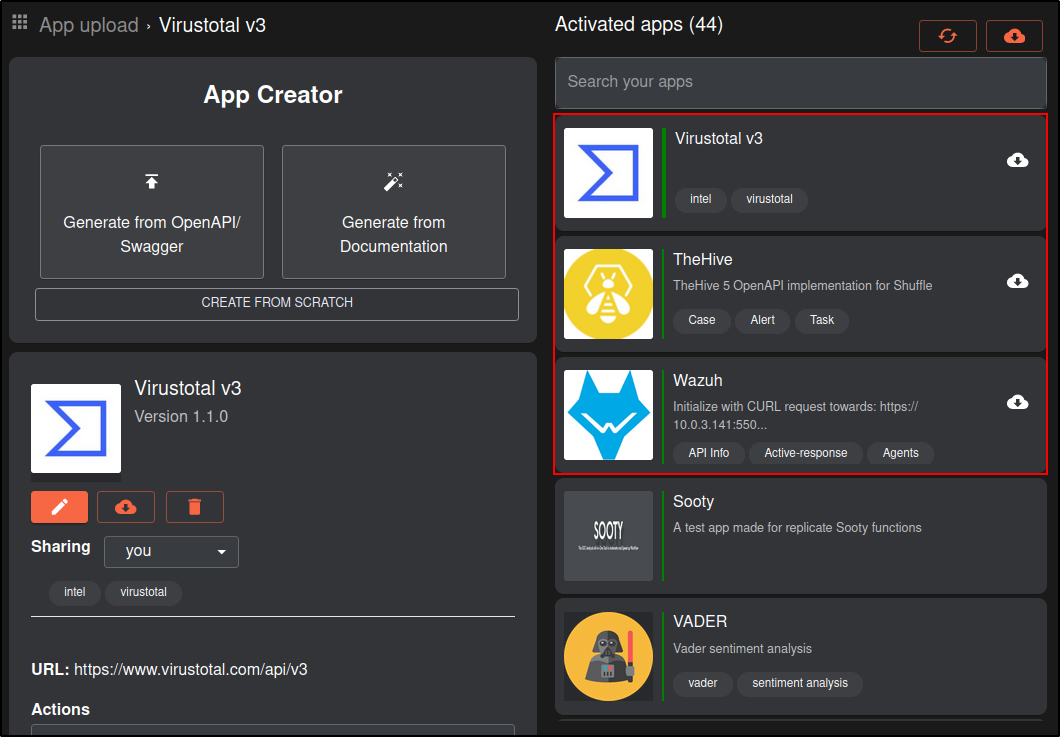
To ensure that the new app is recognized by Shuffle, restart the Shuffle backend and frontend containers:
Create a Workflow
Repeat the steps covered in Introduction to Shuffle.
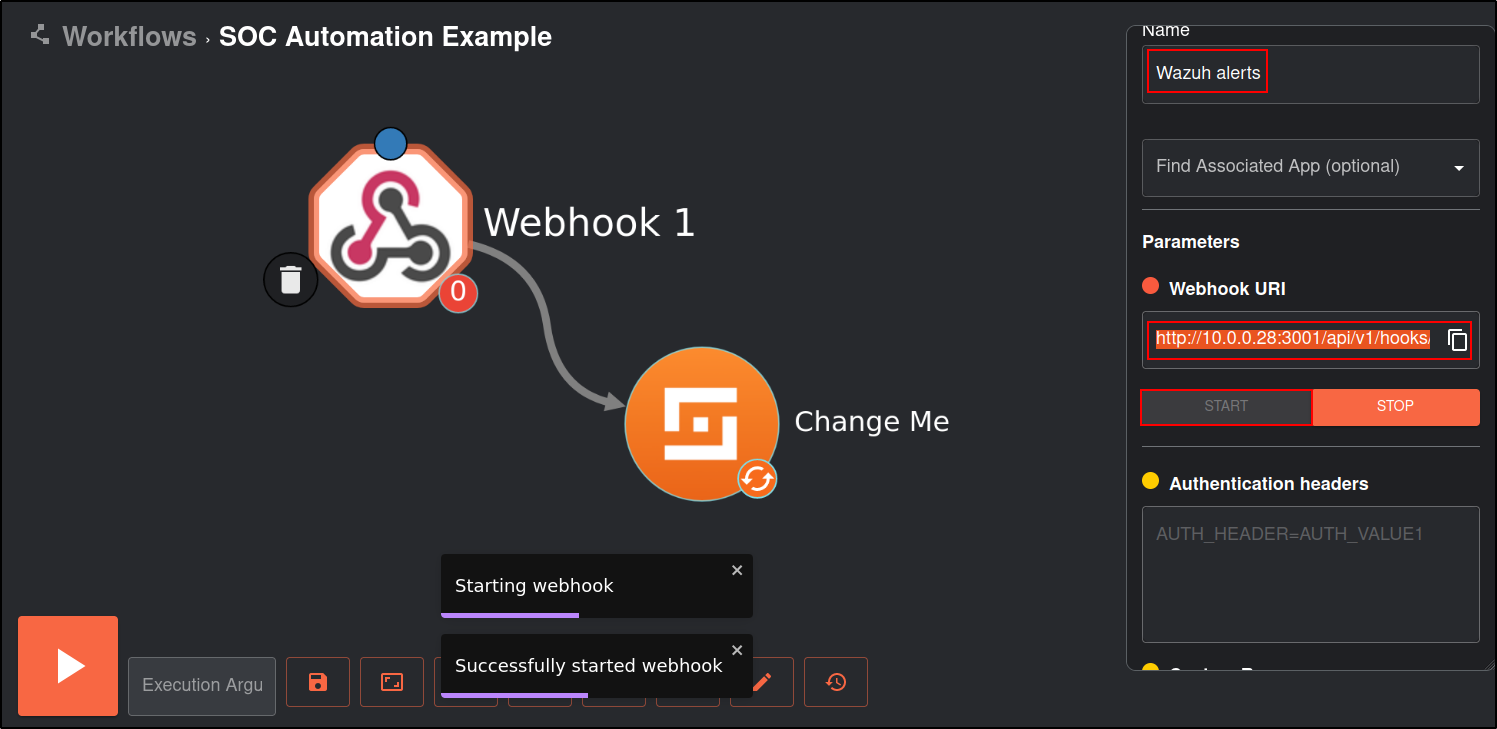
Create a new workflow called SOC Automation Example.
Click on the Triggers tab in the bottom left and drag the Webhook to the workspace.
Click on the webhook and rename it to Wazuh alerts. Copy and save the webhook URI and start the webhook. The webhook URI looks like the following:
http://10.0.0.28:3001/api/v1/hooks/WORKFLOW_ONE_WEBHOOK_ID
Configure Wazuh server
Download the custom integration script custom-shuffle and custom-shuffle.py. Save it as custom-shuffle and custom-shuffle.py in /var/ossec/integrations directory. The script must contain execution permissions and belong to the root user of the wazuh group:
chmod 750 /var/ossec/integrations/custom-shuffle*
chown root:wazuh /var/ossec/integrations/custom-shuffle*
Copy and paste the following into /var/ossec/etc/ossec.conf
This is the rule id for Mimikatz Usage Detected that we defined in the Wazuh Manager
 <integration>
      <name>custom-shuffle</name>
      <rule_id>100200</rule_id>
      <hook_url>http://10.0.0.28:3001/api/v1/hooks/WORKFLOW_ONE_WEBHOOK_ID</hook_url>
      <alert_format>json</alert_format>
  </integration>
Restart the Wazuh manager service to apply changes:
Verify that there are no errors in the ossec and integrations logs
Configure Shuffle
Click on the Shuffle Tools app named “Change me” and rename it to Receive_Wazuh_alerts. Set the call option to “$exec”, and save the workflow. This Shuffle app now repeats the events that are received by the Wazuh alerts webhook. This allows us to test that Shuffle can receive Wazuh alerts.
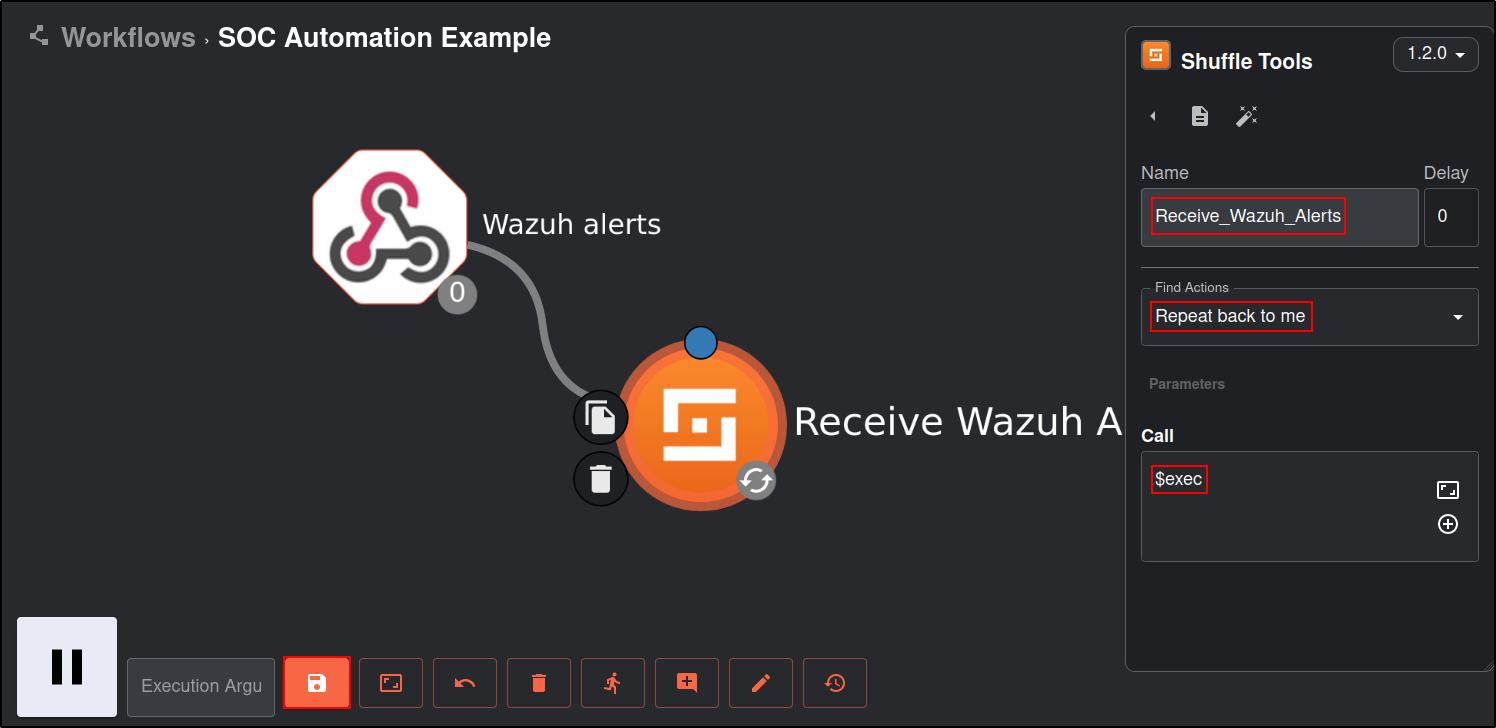
On Windows host, open PowerShell as Administrator and execute mimikatz (justanexe)
On Wazuh server, verify logs related to Mimikatz are generated
Verify Shuffle is receiving alerts without any errors
Alerts should be green indicating status is FINISHED
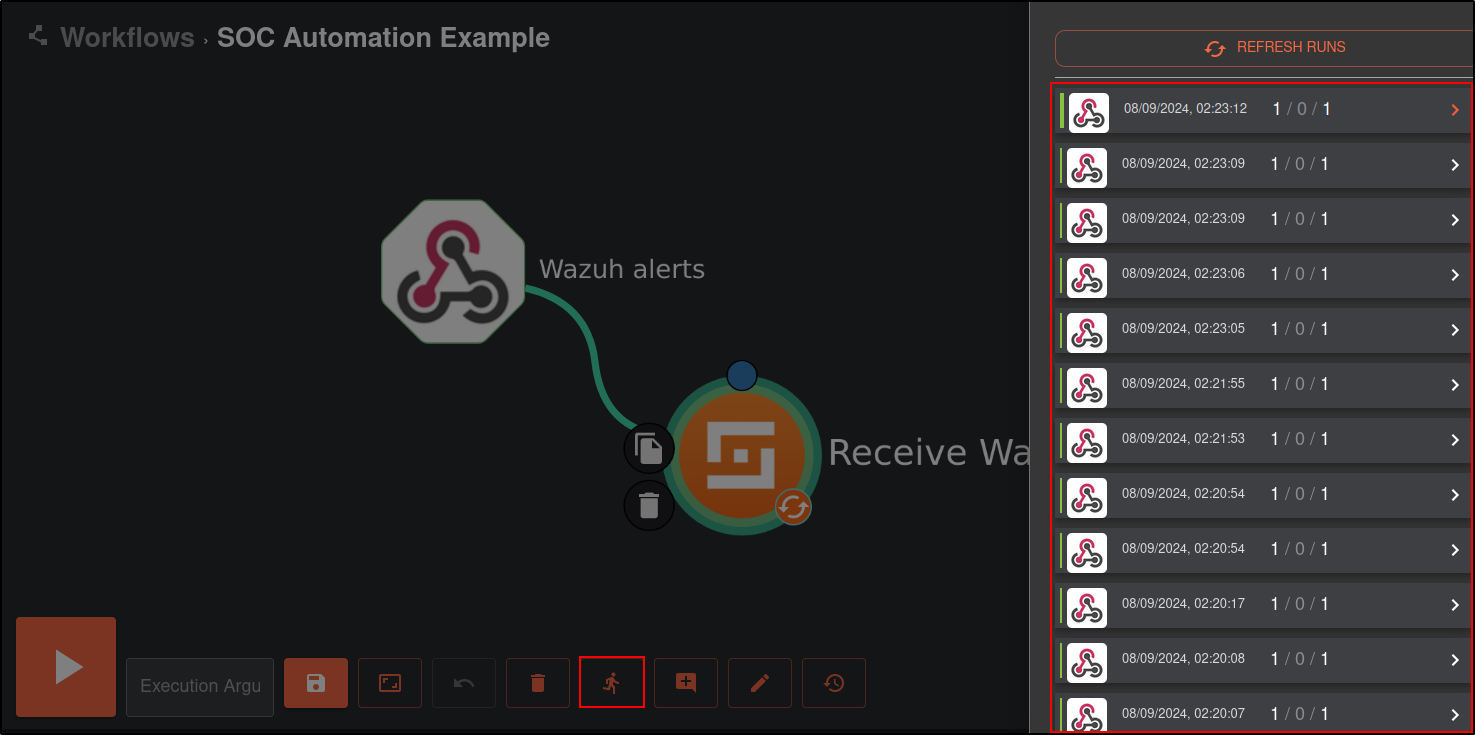
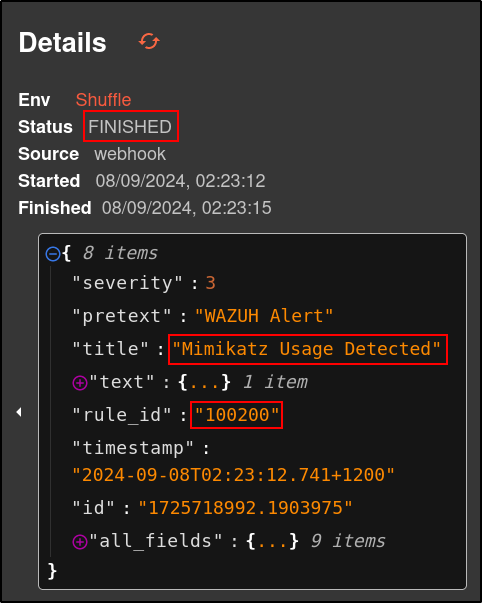
The results displays a SHA1, MD5 and SHA256 hashes
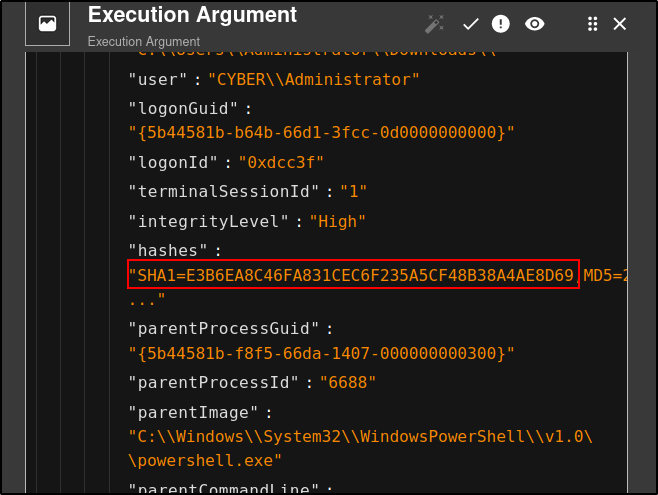
SHA1=E3B6EA8C46FA831CEC6F235A5CF48B38A4AE8D69,MD5=29EFD64DD3C7FE1E2B022B7AD73A1BA5,SHA256=61C0810A23580CF492A6BA4F7654566108331E7A4134C968C2D6A05261B2D8A1,IMPHASH=55EE500BB4BDFC49F27A98AE456D8EDF
Create a regular expression to specifically extract the SHA256 hash from the string.
Click Shuffle Tools icon. Change the Name to Capture_SHA256_HASH, Find Actions to Regex Capture group, Input data to $exec.text.win.eventdata.hashes and Regex to SHA256=([A-Fa-f0-9]{64})
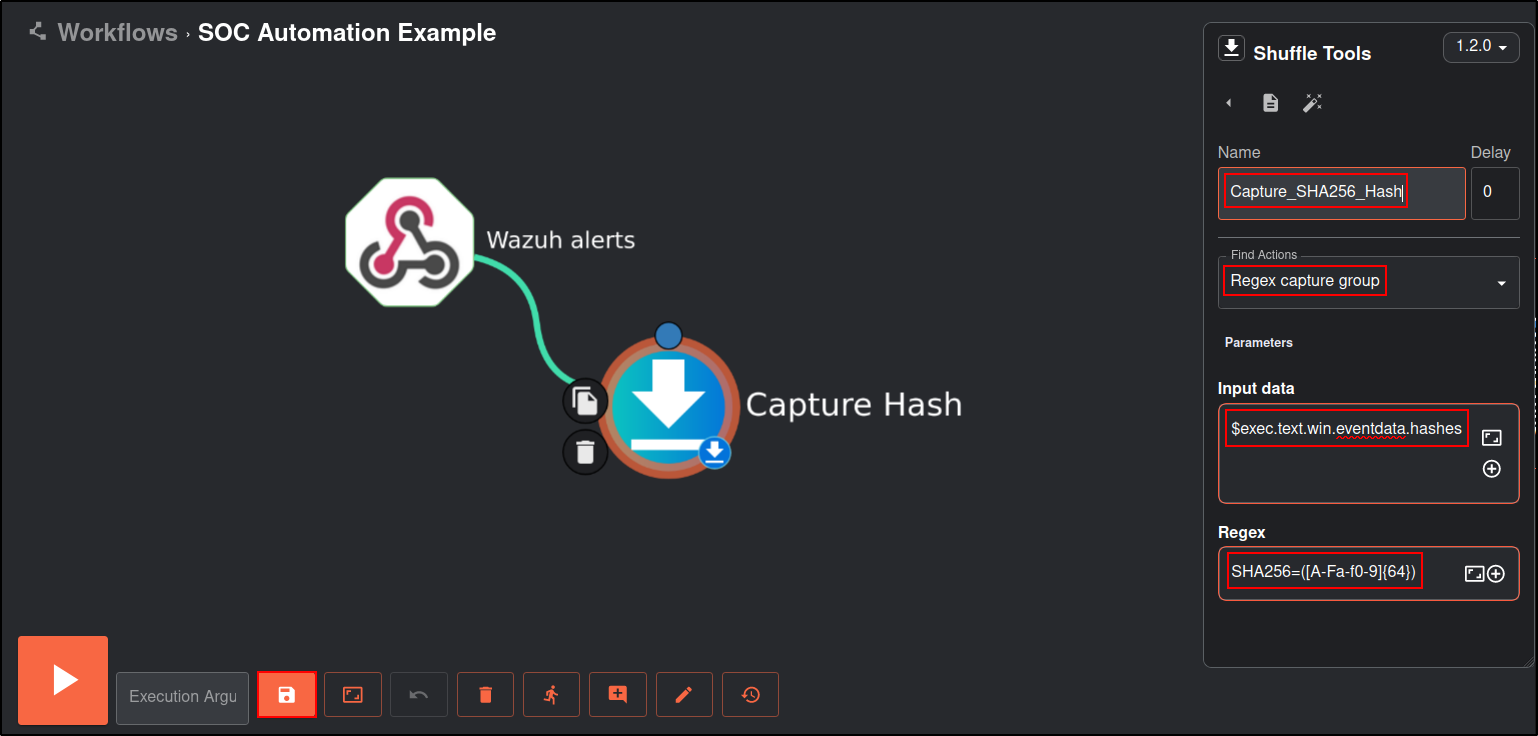
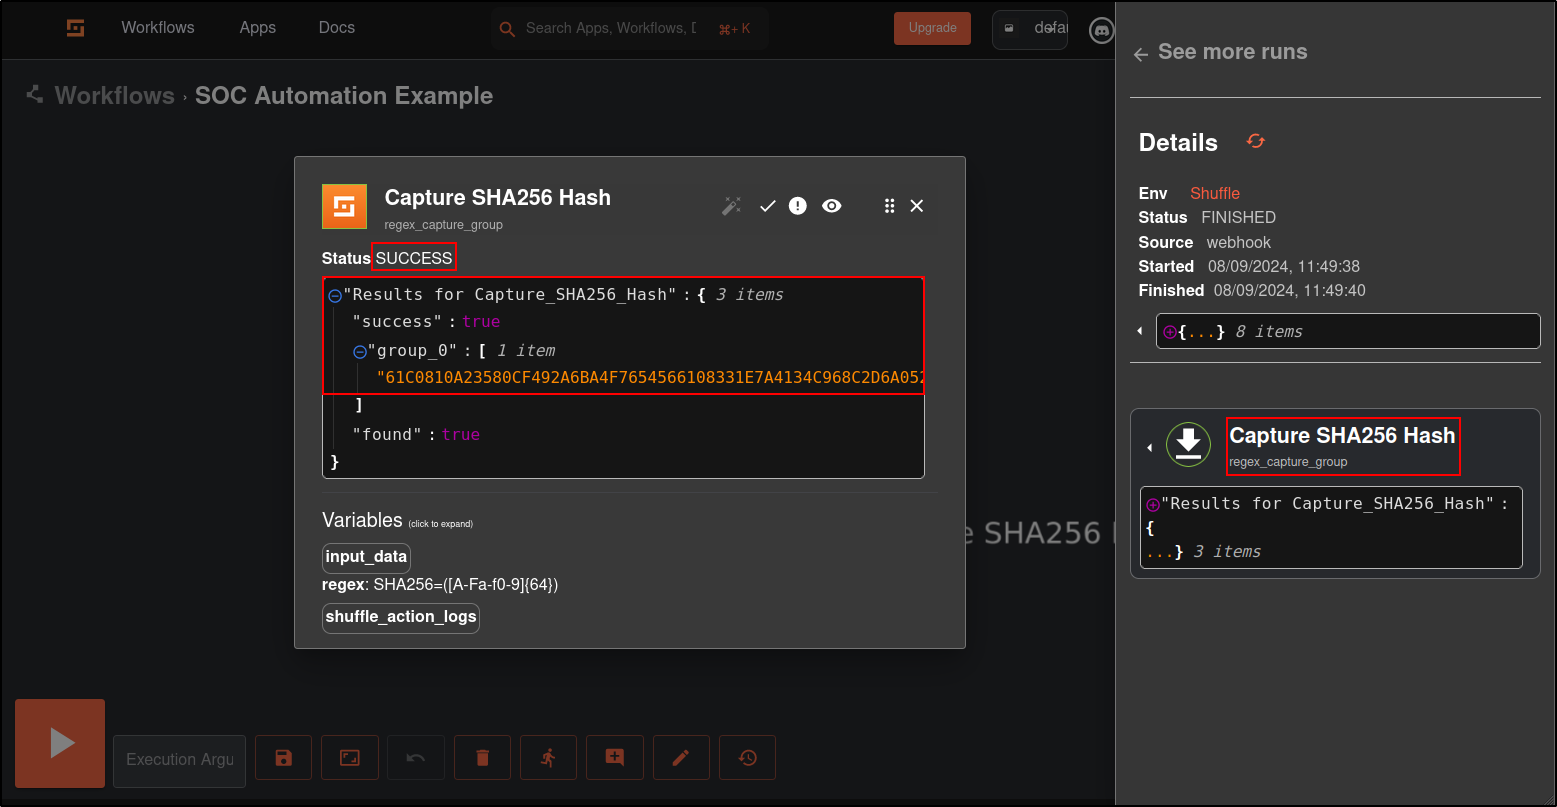
Save the workflow. Trigger the rule id 100200 by running mimikatz (justanexe) from Windows host.
You should see SHA256 hash returned in the results. If you are not seeing the SHA256 hash, try restarting your Shuffle by running docker compose down and docker compose up -d
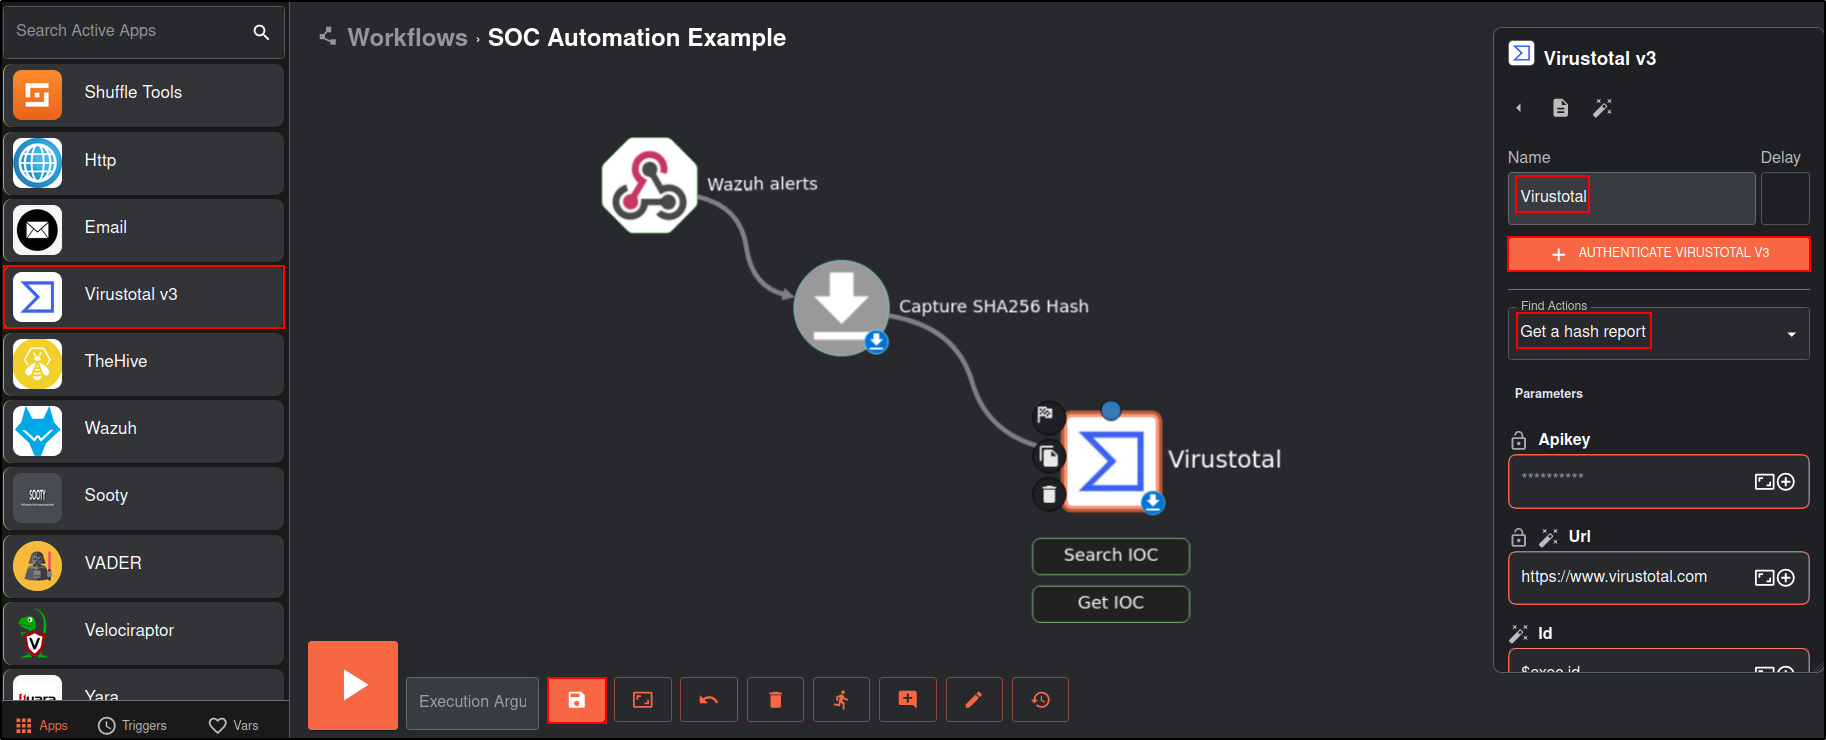
Drag and drop the VirusTotal app. Change the name to VirusTotal and set Find Actions to Get a hash report.
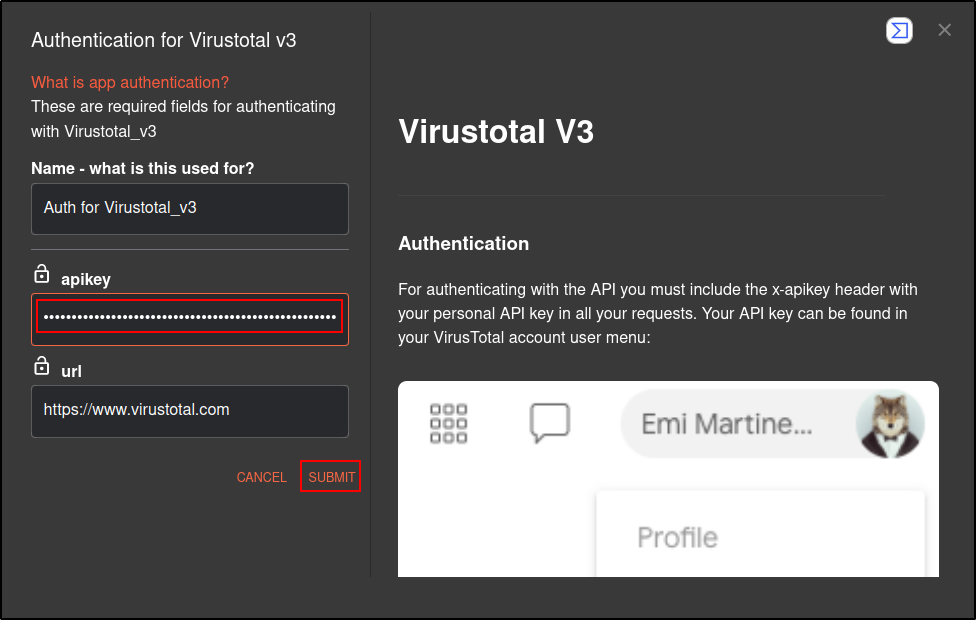
Click Authenticate VirusTotal V3 and copy and paste your VirusTotal API key. You must create an account in VirusTotal to obtain the API key. Note: Internet connection was enabled from this point.
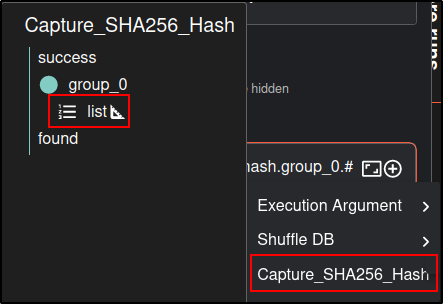
For ID, select Capture_SHA256_Hash list
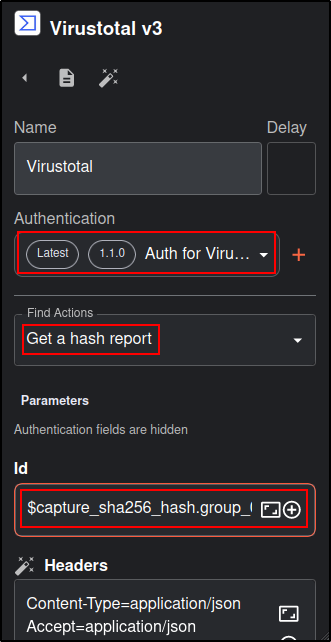
Save the workflow. Restart Shuffle if required.
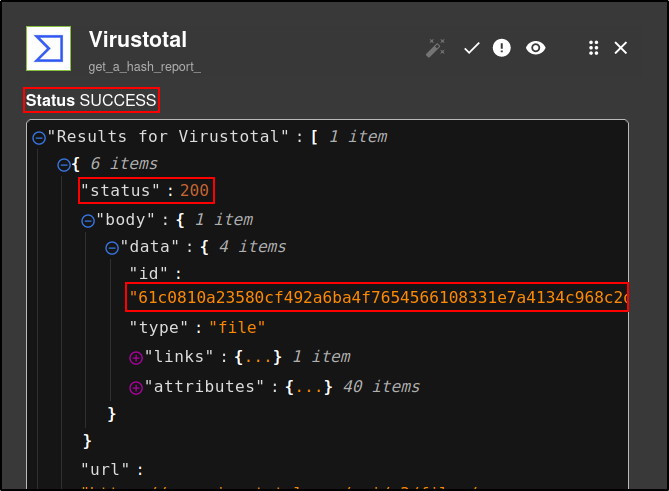
Verify that VirusTotal get_a_hash_report returns the expected SHA-256 hash
with status code 200.
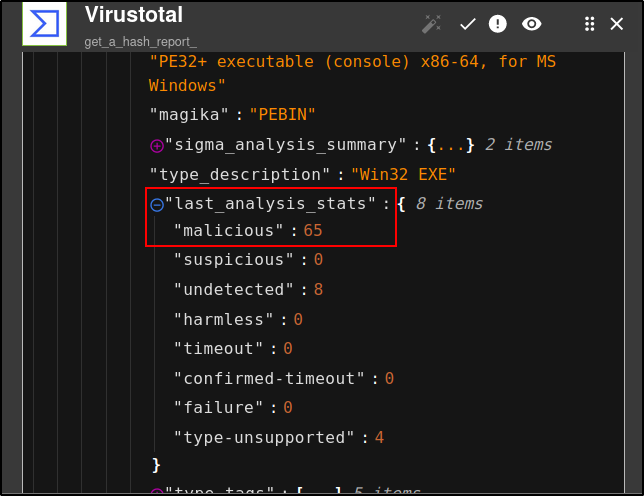
Expand the last_analysis_stats. Malicious: 65 indicates that 65 scanners have detected this executable as malicious.
Configure TheHive
Login to TheHive web UI
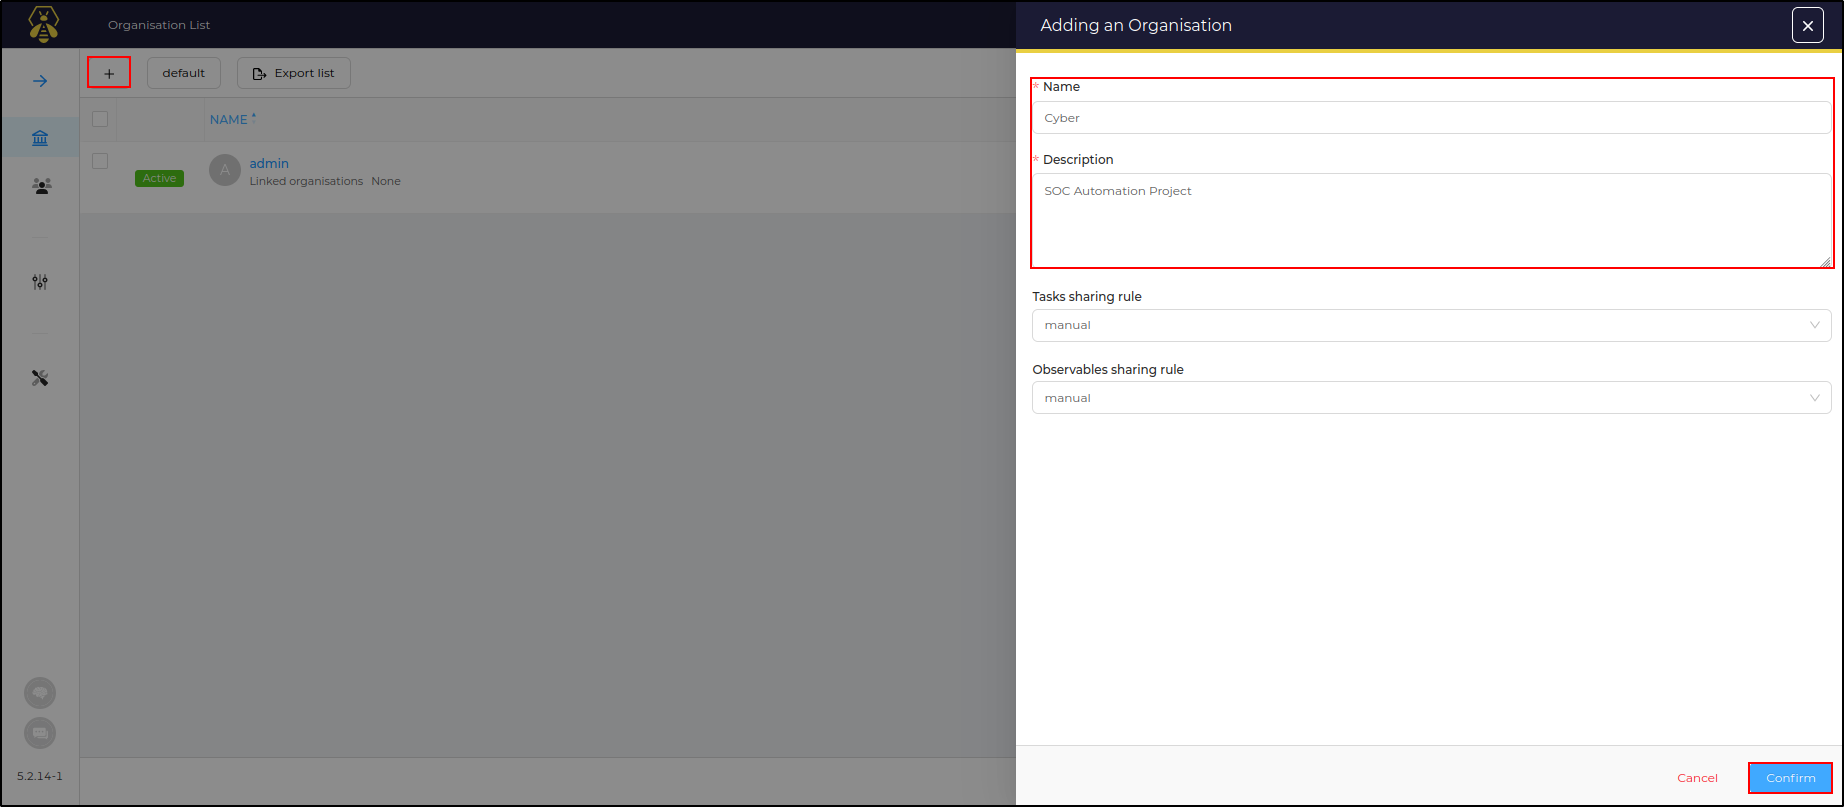
Create a new organisation called Cyber and click Confirm
Click Cyber organisation
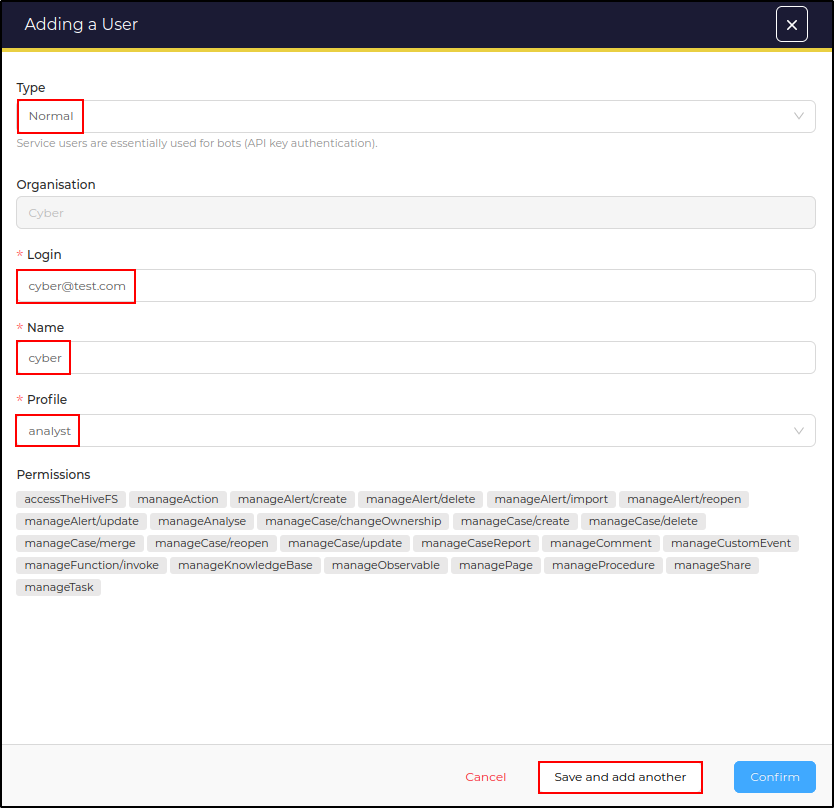
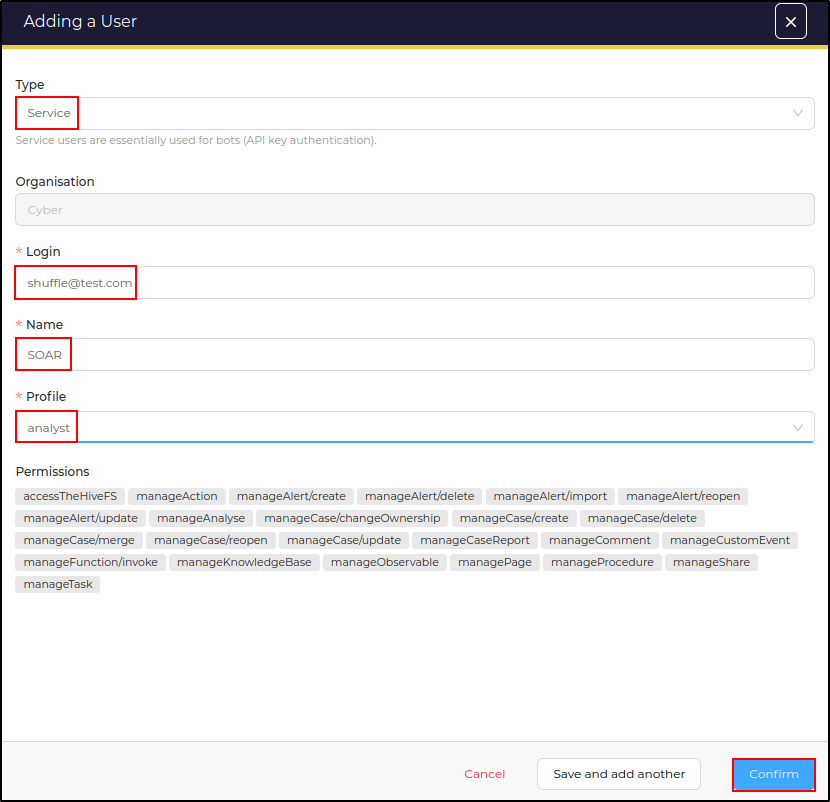
Add a new user with following details
- Type: Normal
- Login: cyber@test.com
- Name: cyber
- Profile: analyst
Save and add another user
Add the second user with following details
- Type: Service
- Login: shuffle@test.com
- Name: SOAR
- Profile: analyst
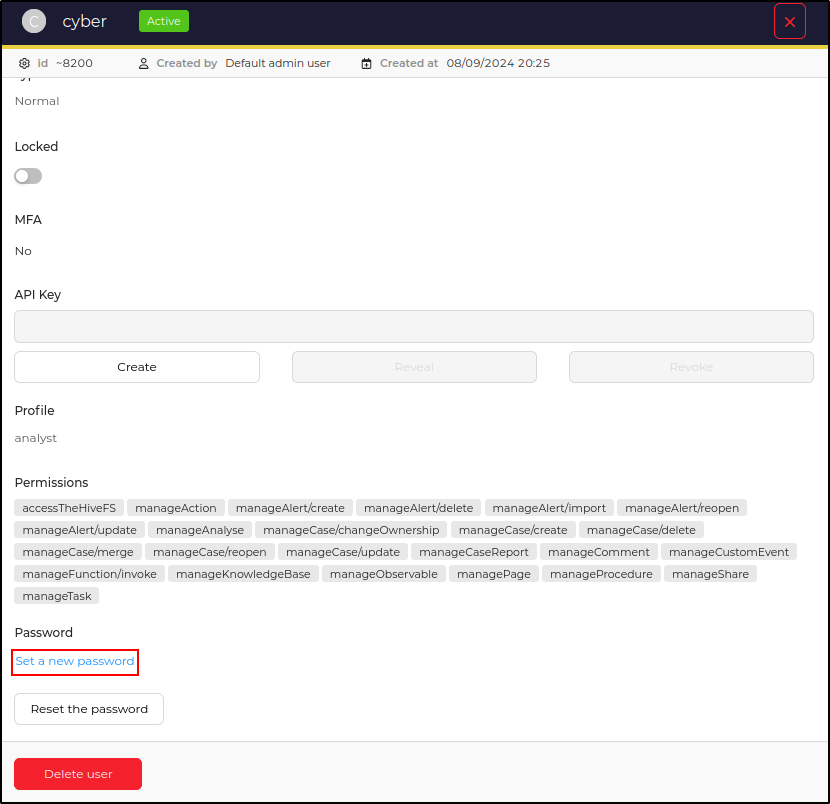
Click Preview on the cyber user and set a new password
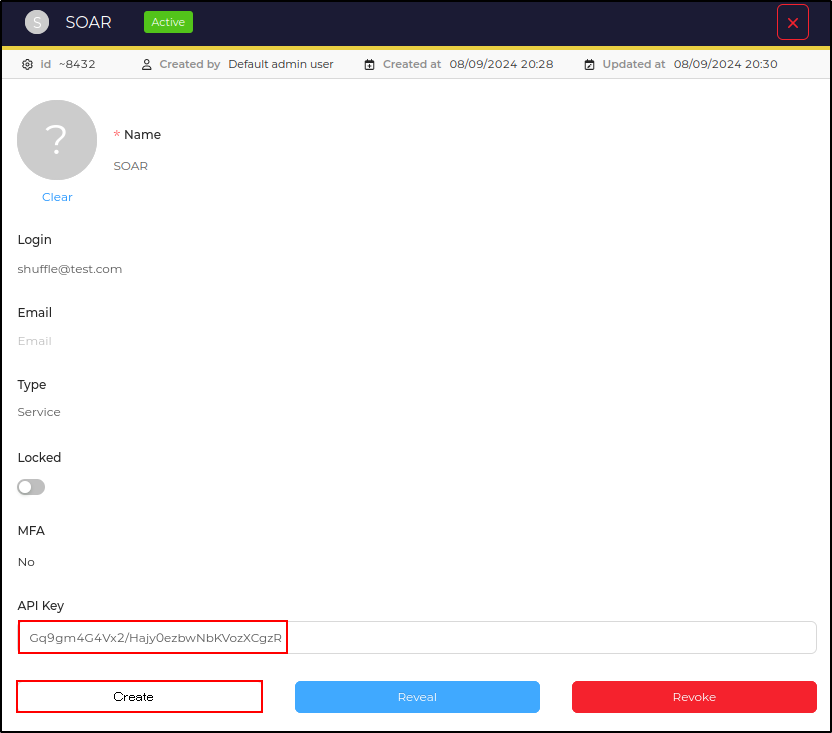
Click Preview on the SOAR user and create a new lab-only API key. Copy it to a password manager and do not place the real value in screenshots or documentation. If the previously documented key was ever active, revoke it.
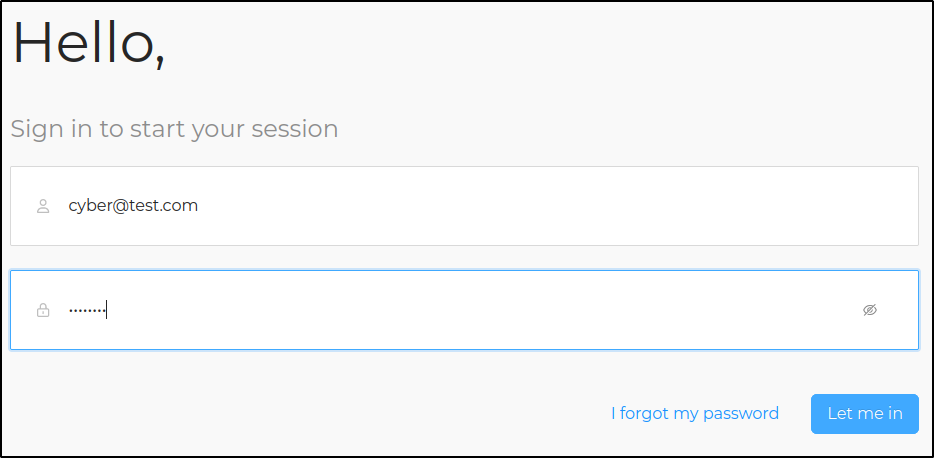
Log out of the web UI as admin and login as the cyber user.
Configure Shuffle
Drag and drop TheHive app to the Workflow.
Click TheHive App and click Authenticate TheHive.
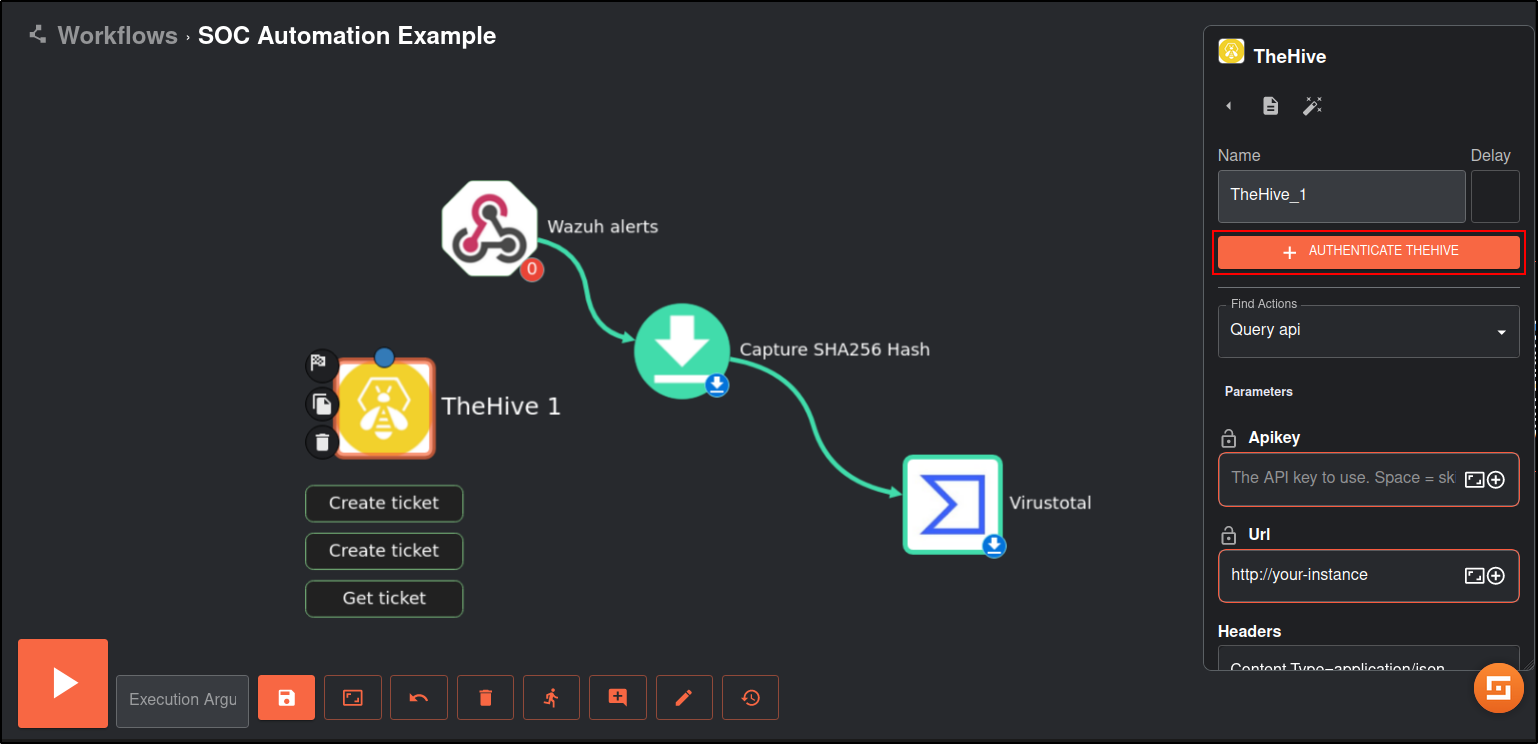
Copy and paste the newly created <THEHIVE_API_KEY> value.
Enter the url for TheHive http://10.0.0.40:9000
Click Submit.
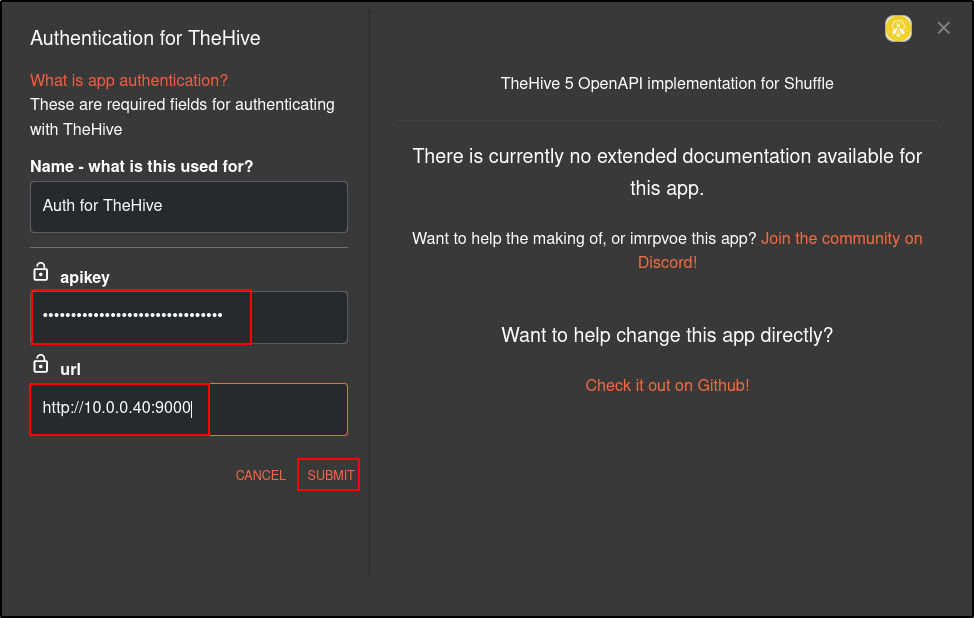
Set Find Actions to Create alert
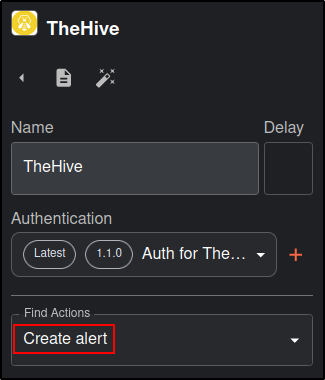
Connect Virustotal App to TheHive app
There seems to be a bug with how TheHive app handles some of its parameters at the backend.
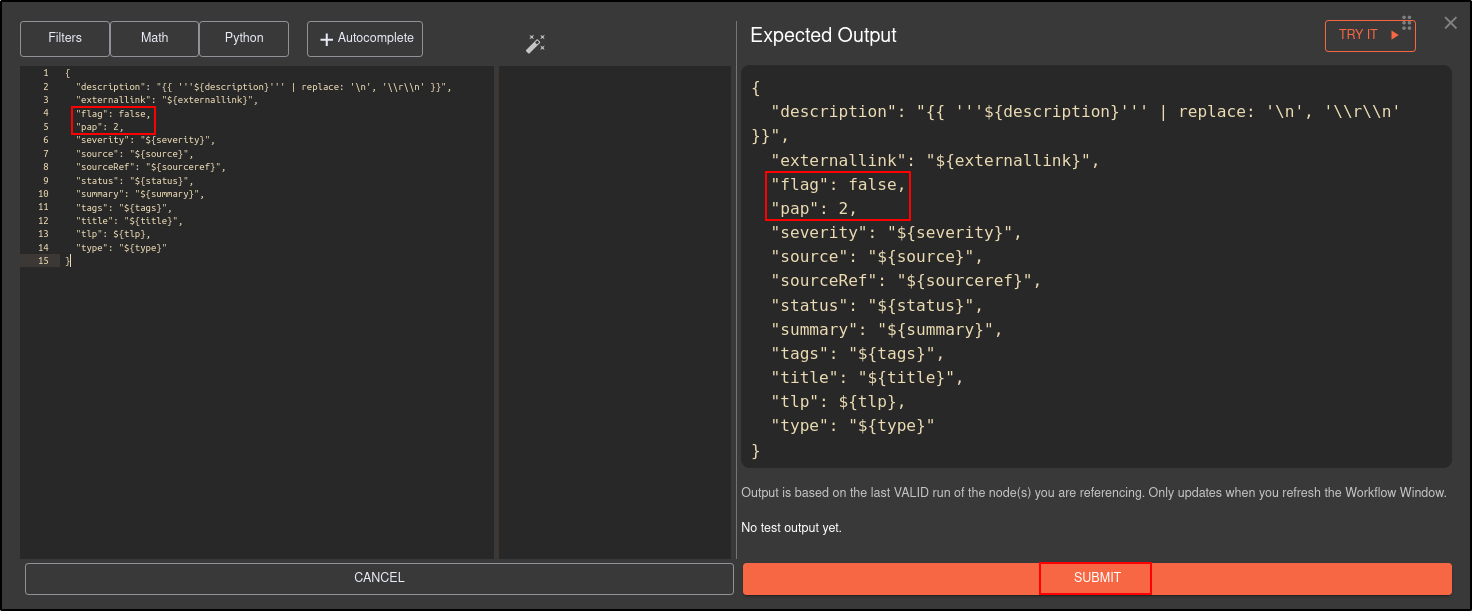
To bypass the error, set the values for Flag and Pap in JSON first.
Uncheck Show Body textbox. You should see Hide Body. Click Expand Window icon.
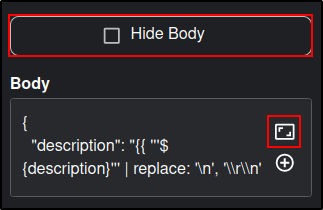
Manually set the Flag to false and Pap to 2. Click Submit.
{
  "description": "{{ '''${description}''' | replace: '\n', '\\r\\n' }}",
  "externallink": "${externallink}",
  "flag": false,
  "pap": 2,
  "severity": "${severity}",
  "source": "${source}",
  "sourceRef": "${sourceref}",
  "status": "${status}",
  "summary": "${summary}",
  "tags": "${tags}",
  "title": "${title}",
  "tlp": ${tlp},
  "type": "${type}"
}
Check the Show Body and this will allow you to edit the app in GUI.
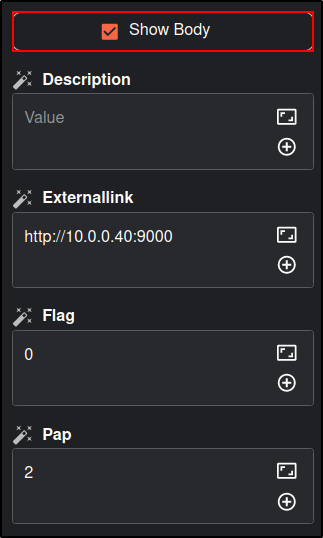
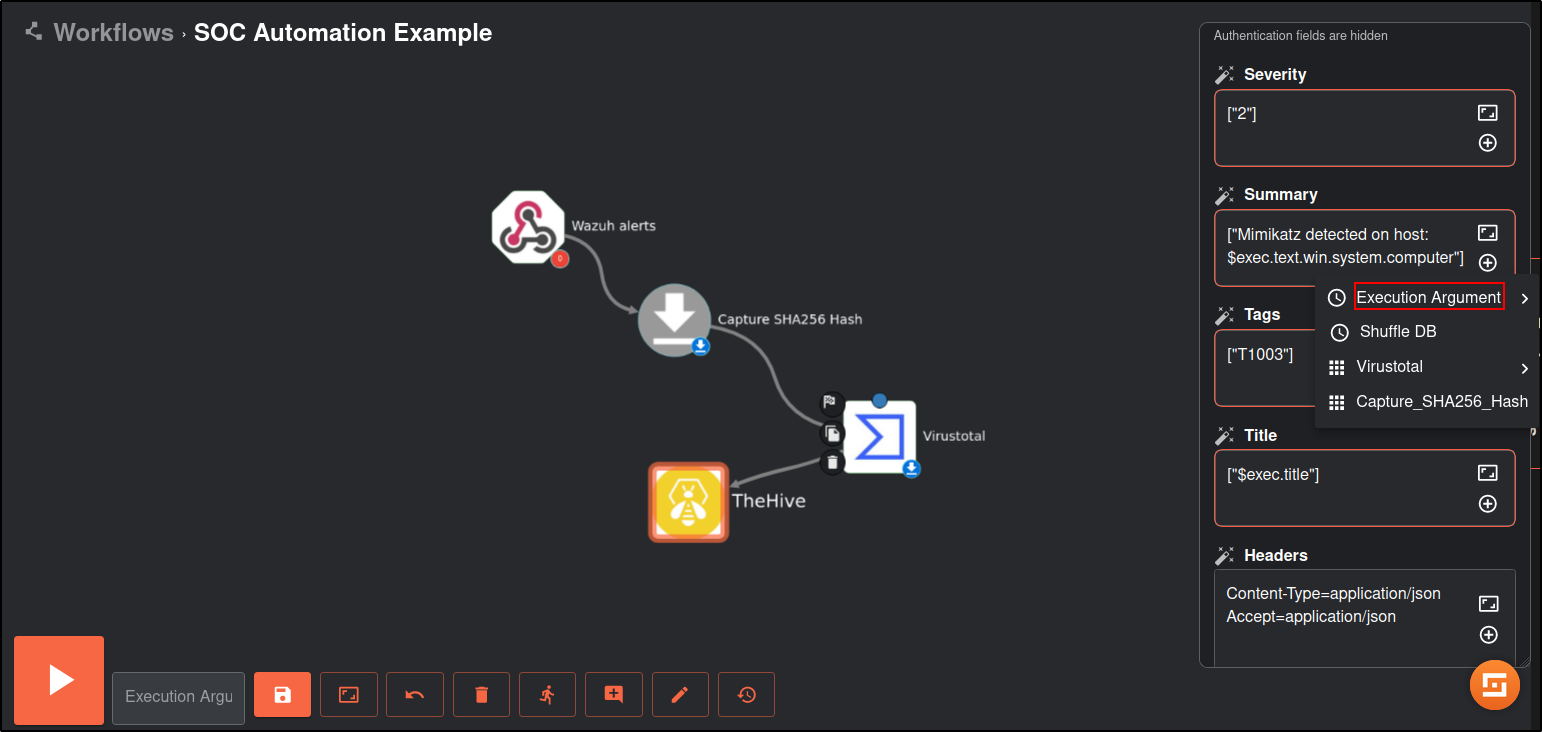
Set the values to the following.
Note: the values in brackets indicate the Execution Argument. Add the execution argument by clicking the + icon.
| Name | Create_Alert |
|---|---|
| Severity | 2 |
| Summary | Mimikatz detected on host: (computer) and the processID: (processID) and commandLine: (commandLine) |
| Tags | [”T1003”] |
| Title | (title) |
| Description | (rule description) |
| Flag | false |
| Pap | 2 |
| Source | Wazuh |
| Sourceref | Incident-(timestamp) |
| Status | New |
| Tlp | 2 |
| Type | Internal |
Save the workflow. Click Show Execution (person icon) then rerun the workflow (refresh icon).
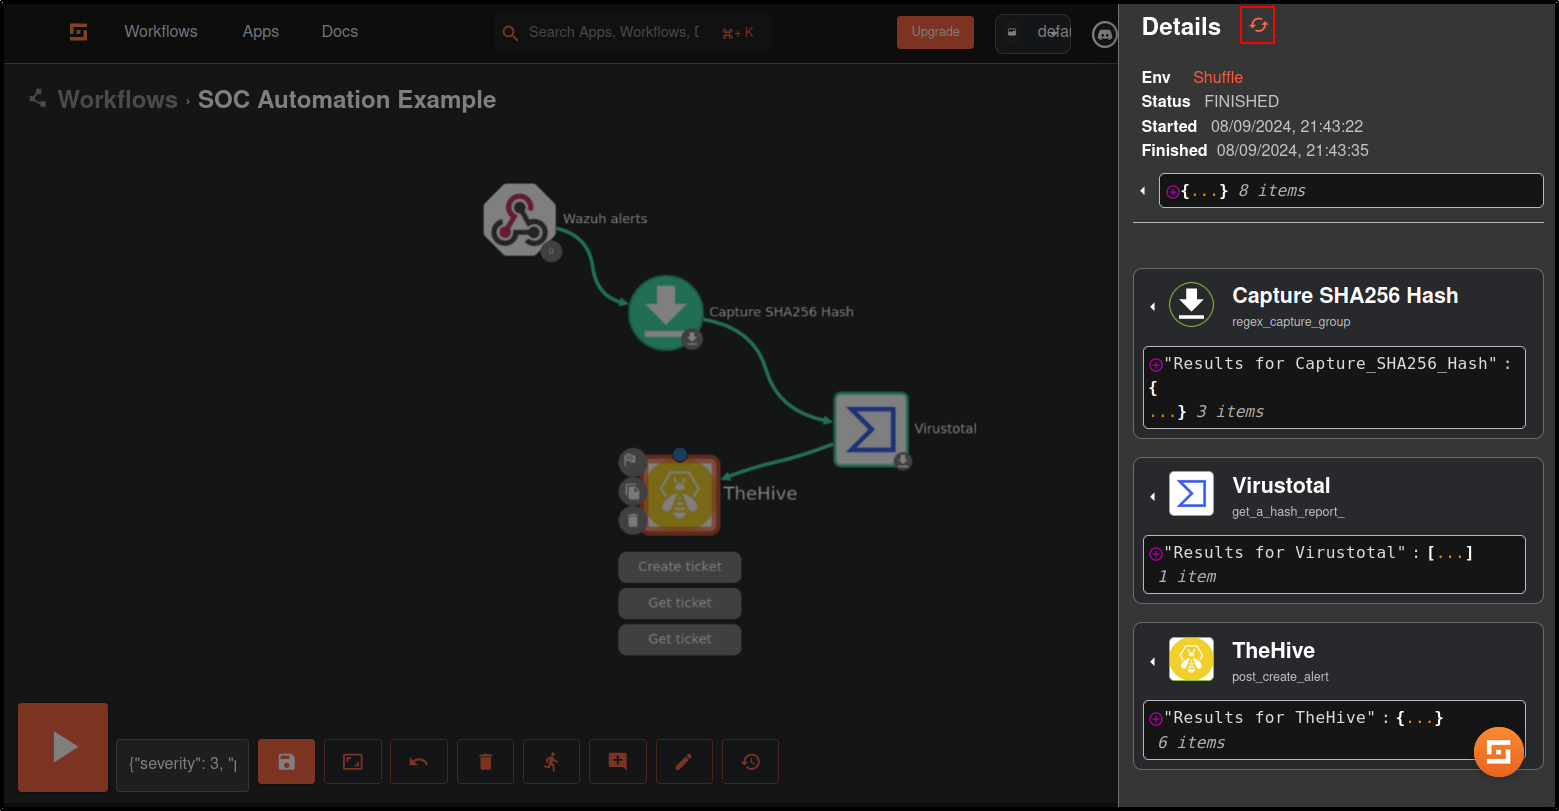
Verify status code from TheHive is 201
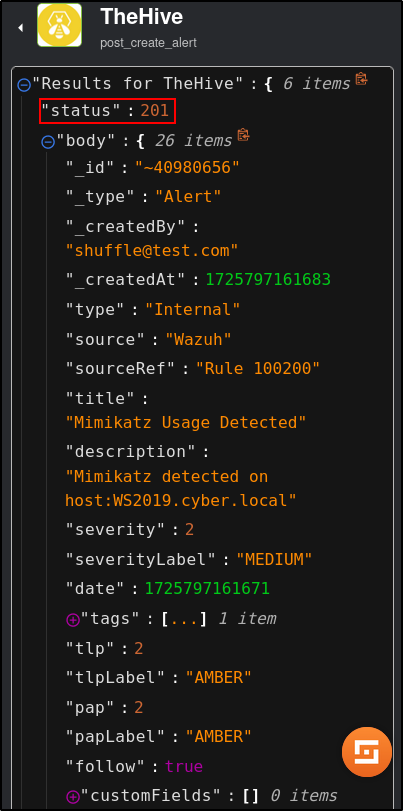
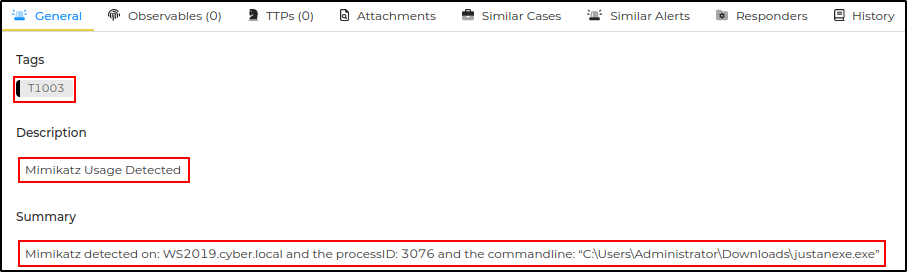
Verify that the Mimikatz Usage Detected alert is generated on TheHive UI.

Click on the alert to view the details.
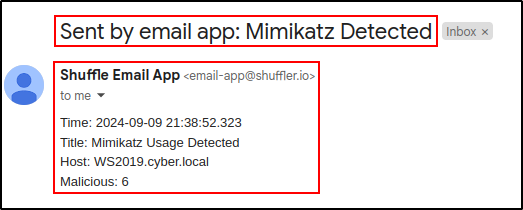
Drag and drop the Email app to the workflow.
Edit the Email app with following details:
Note: the values in brackets indicate the Execution Argument. Add the execution argument by clicking the + icon.
| Name | |
|---|---|
| Find Actions | Send email shuffle |
| Apikey | (Create account on https://shuffler.io/ to obtain API key) |
| Recipients | (Email address receiving the alert) |
| Subject | Mimikatz detected |
| Body | Time: (utcTime) |
| Title: (title) | |
| Host: (computer) | |
| Malicious: (malicious)* |
*Select VirusTotal metadata instead of the Execution Argument |
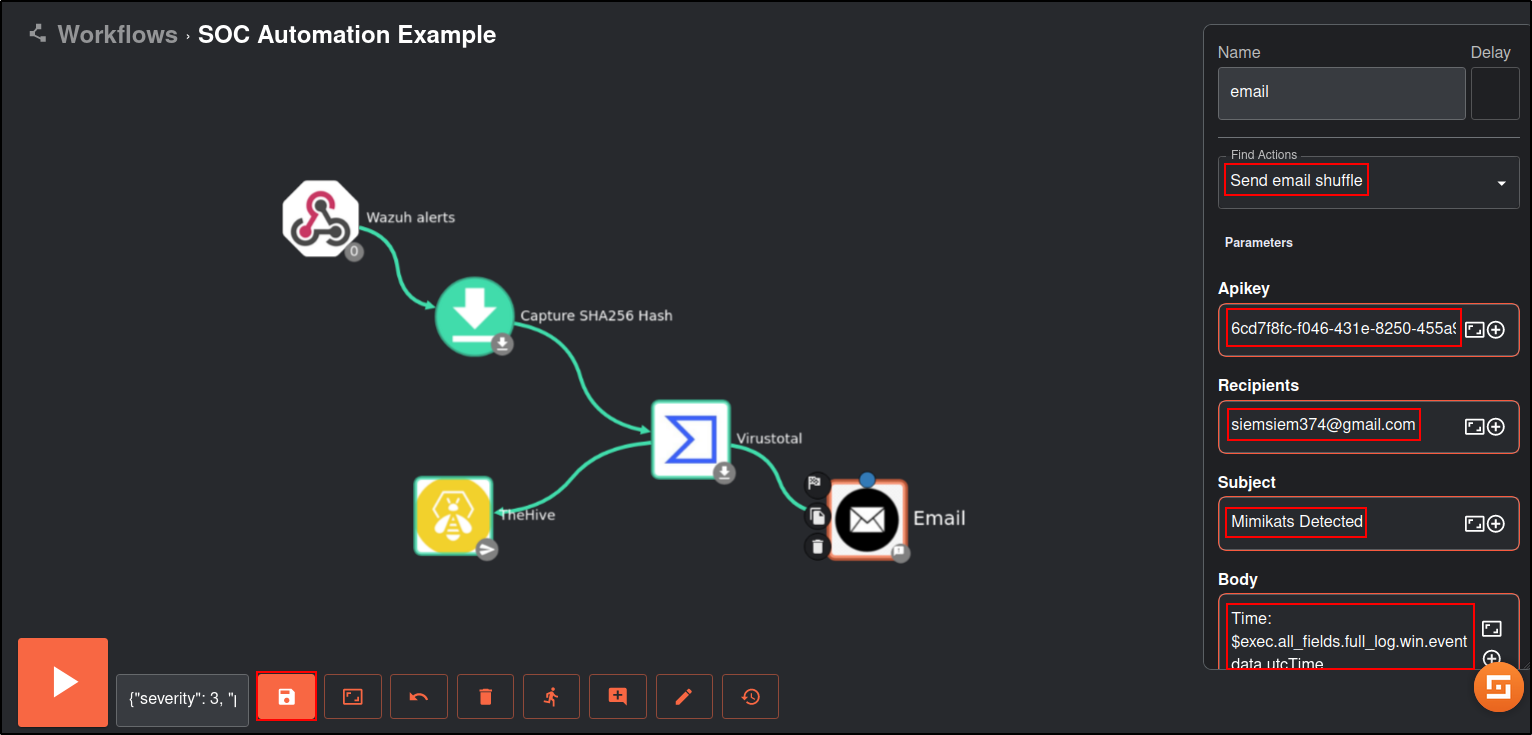
Save and rerun the workflow. If you want to get status code 201 from TheHive, you must delete existing alert. Verify that the results are successful and you received the email.
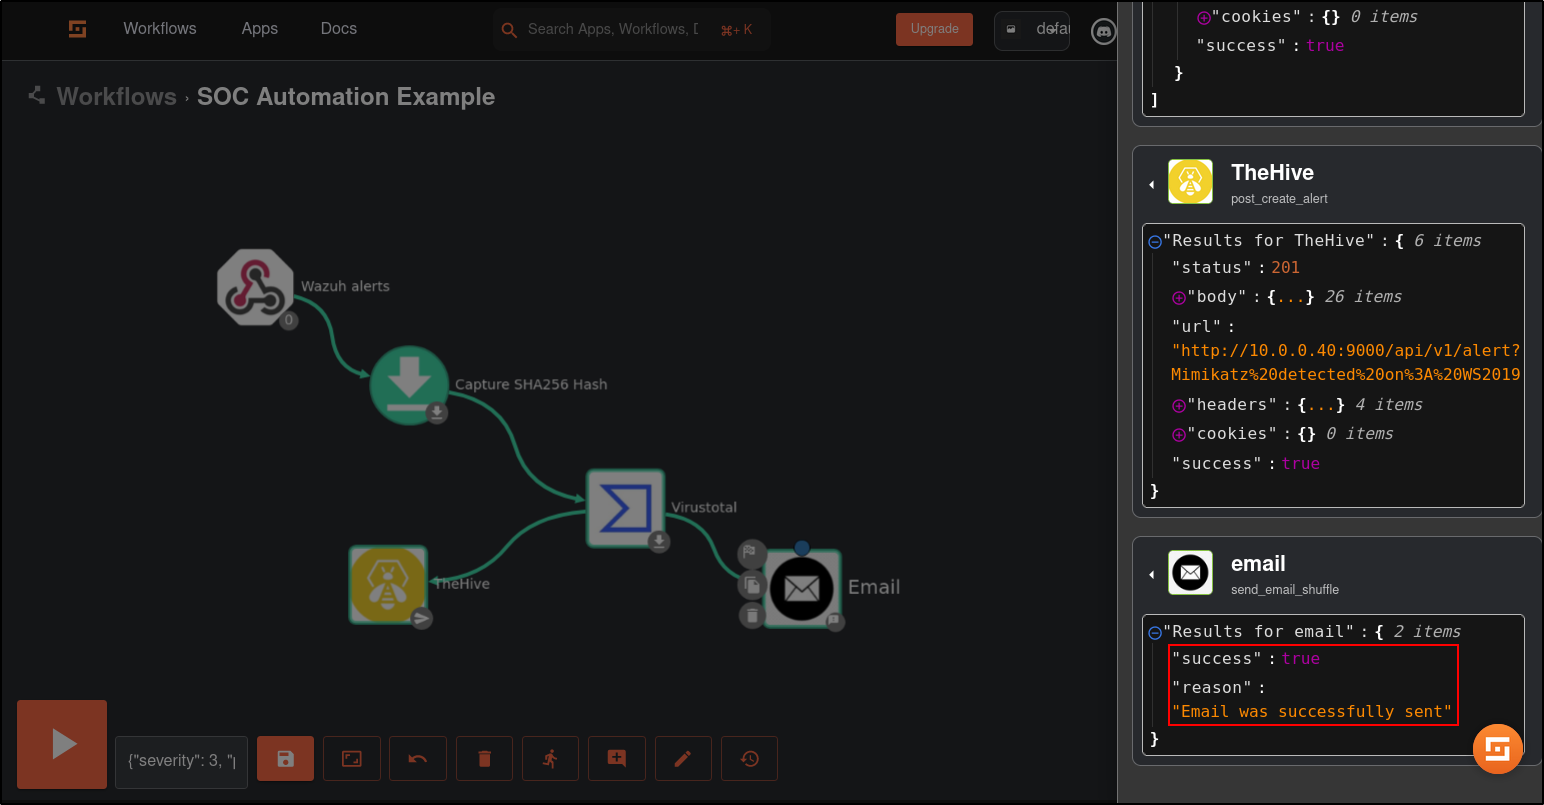
Duplicate TheHive app in the workflow.
Edit the TheHive app with following details:
Note: the values in brackets indicate the metadata from Create_Alert. Add the data by clicking the + icon.
| Name | Create_Case |
|---|---|
| Alertid | (body id) |
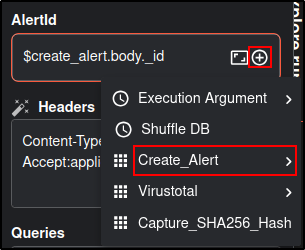
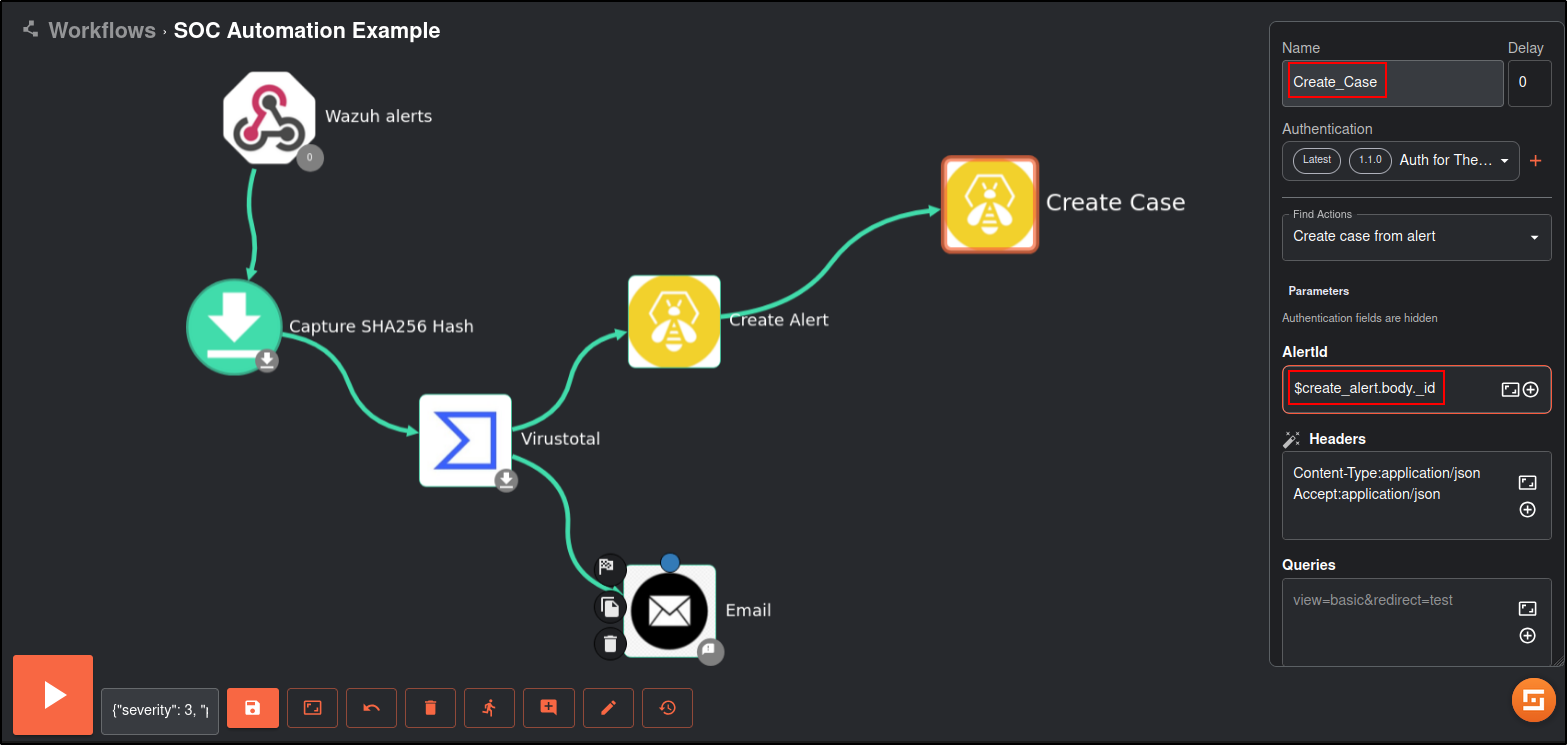
Save and rerun the workflow. You may need to delete existing alert in TheHive.
Verify that results return status code 201.
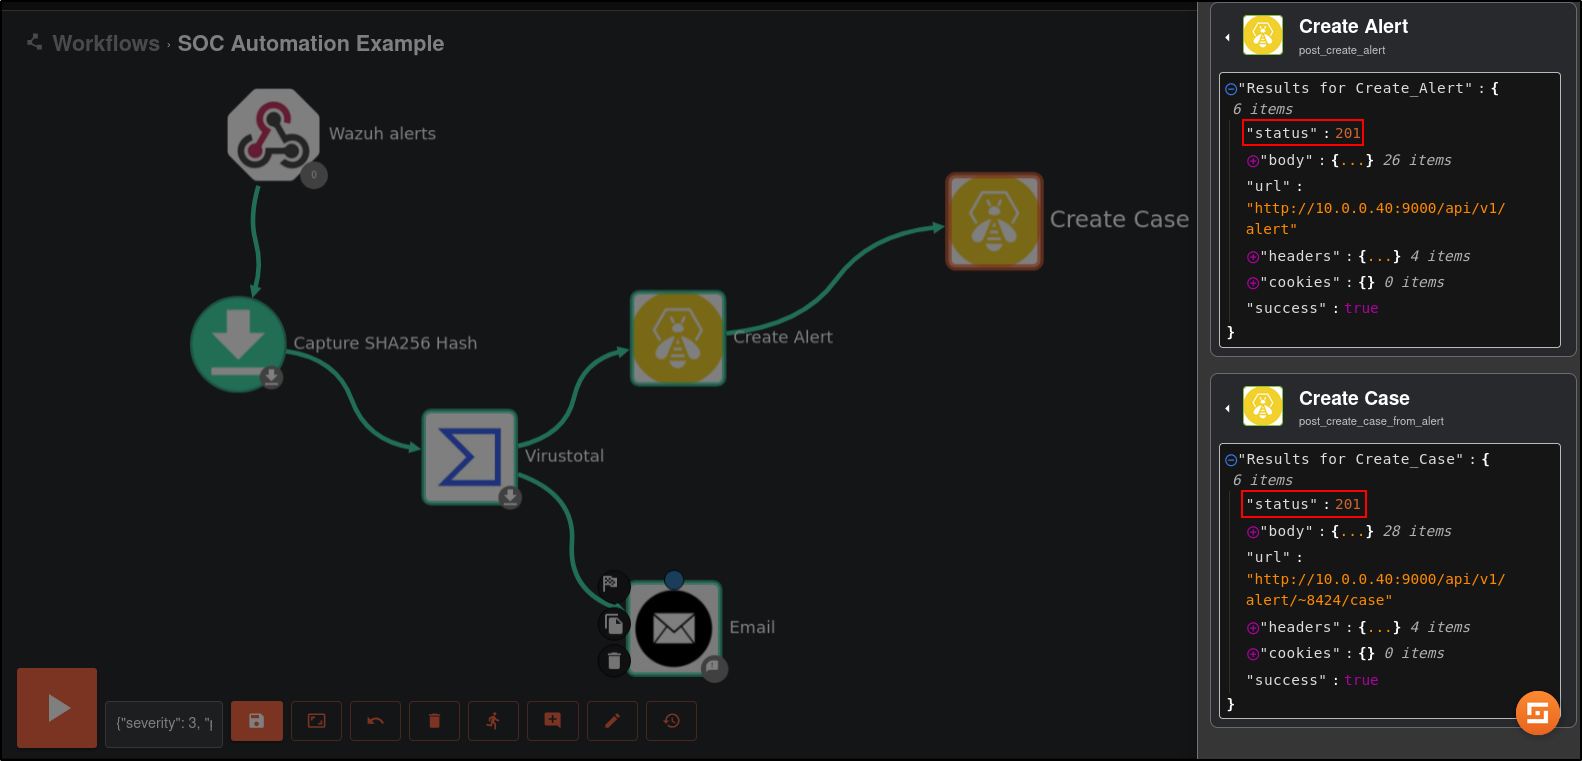
Verify that the case has been created in TheHive.
