Configure Endpoint Forwarders
Deploy Universal Forwarders and collect Windows, Sysmon, and Linux events. The virtual-account installation remains available as an optional annex.
Installing Sysmon on Windows
For another demonstration of this process, see the Sysmon event collection walkthrough.
Download Sysmon and sysmonconfig.xml. Extract Sysmon.zip and move sysmonconfig.xml into the Sysmon folder where Sysmon.exe is located. Run PowerShell as Administrator and change directory to the path where Sysmon was extracted. Install Sysmon by running the following command:
#Example output

PS C:\Users\Administrator\Downloads\Sysmon\Sysmon> ls

    Directory: C:\Users\Administrator\Downloads\Sysmon\Sysmon

Mode                LastWriteTime         Length Name
----                -------------         ------ ----
------        7/23/2024   2:08 PM           7490 Eula.txt
------        7/23/2024   2:08 PM        8480560 Sysmon.exe
------        7/23/2024   2:08 PM        4563248 Sysmon64.exe
------        7/23/2024   2:08 PM        4993440 Sysmon64a.exe
-a----        8/26/2024   7:31 PM         123257 sysmonconfig.xml

PS C:\Users\Administrator\Downloads\Sysmon\Sysmon> .\Sysmon64.exe -accepteula -i .\sysmonconfig.xml

System Monitor v15.15 - System activity monitor
By Mark Russinovich and Thomas Garnier
Copyright (C) 2014-2024 Microsoft Corporation
Using libxml2. libxml2 is Copyright (C) 1998-2012 Daniel Veillard. All Rights Reserved.
Sysinternals - www.sysinternals.com

Loading configuration file with schema version 4.50
Sysmon schema version: 4.90
Configuration file validated.
Sysmon64 installed.
SysmonDrv installed.
Starting SysmonDrv.
SysmonDrv started.
Starting Sysmon64..
Sysmon64 started.
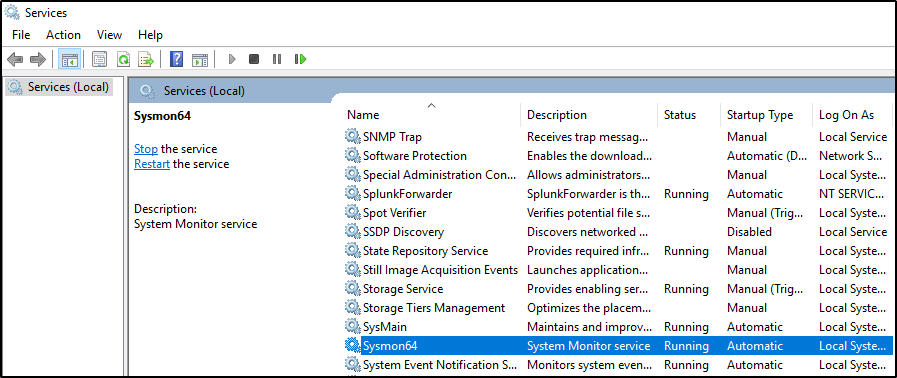
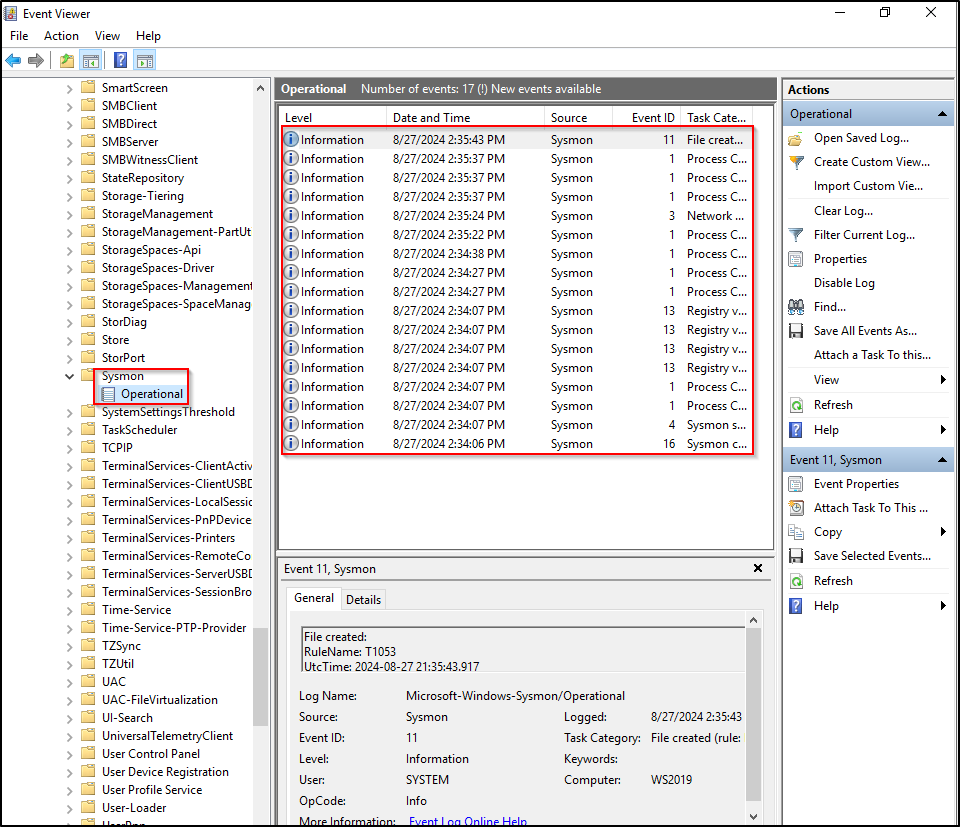
Verify that Sysmon is installed by checking Services (Sysmon64) and Windows Event Viewer (Applications and Services Logs > Microsoft > Windows > Sysmon).
Installing Splunk UF on Windows
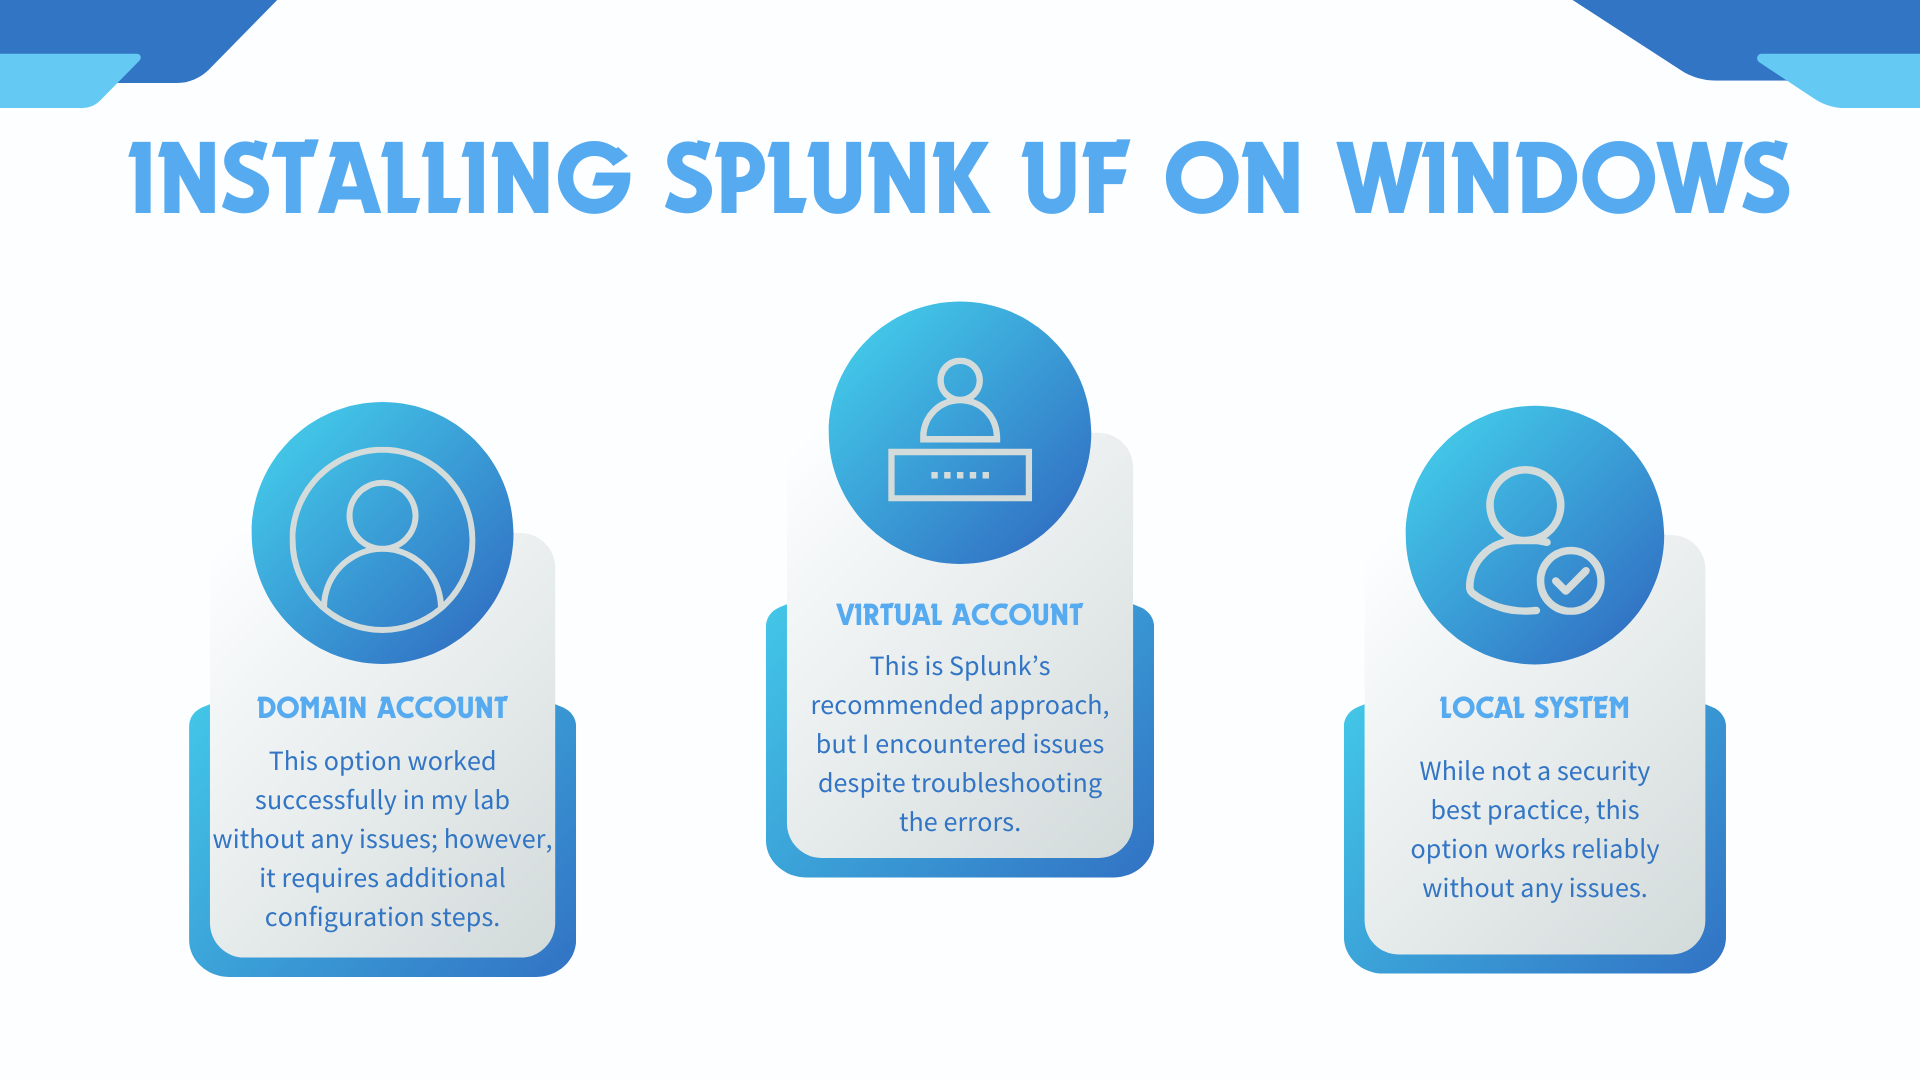
For installing the Splunk Universal Forwarder (UF) on Windows, there are three options:
| Account option | Best fit | Consideration |
|---|---|---|
| Domain account | The Windows host is domain joined. | Worked in this lab but requires additional account and policy configuration. |
| Virtual account | You want Splunk’s recommended service-account approach. | Requires Event Log Readers and Sysmon channel-access configuration. See the virtual account annex. |
| Local System | A constrained lab where the other options do not work. | Reliable in the lab, but not a security best practice. |
This guide demonstrates the domain-account and virtual-account paths. Choose the account model that matches your environment and security requirements.
Installing Splunk UF with a Domain Account (Option 1)
Creating a Domain Account
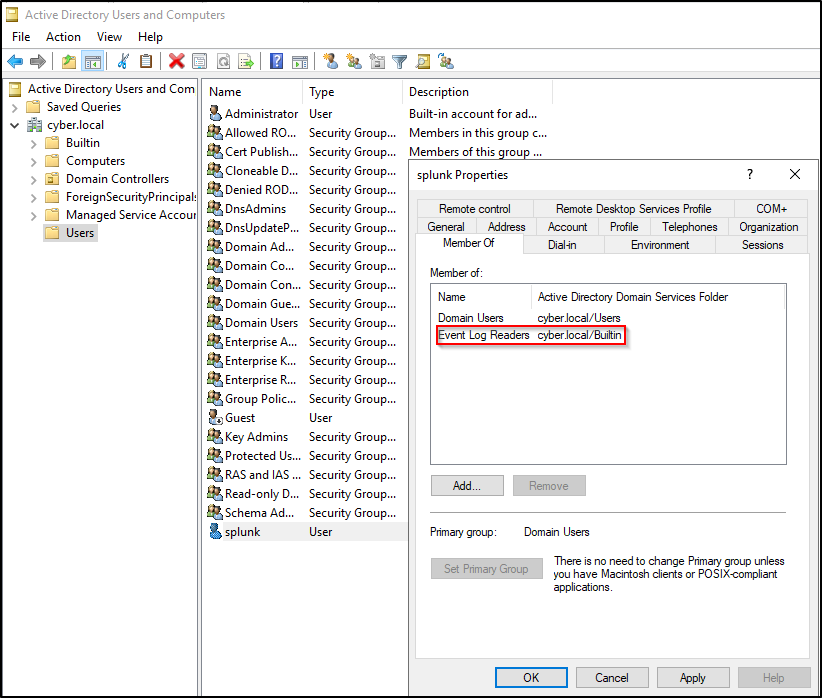
In this lab, WS2019 host is joined to a domain called cyber.local and promoted as a domain controller. This step is applicable to a domain-joined environment. Create a domain user called splunk and assign it as a member of Event Log Readers Group. This account will be used to run Splunk Forwarder.
- Go to Active Directory Users and Computers > domain > Users
- Right-click Users > New > User
- First name: splunk
- Last name: (blank)
- Full name: splunk
- User logon name: splunk
- Right-click splunk user > Properties > Member of > Add > put
Event Log Readersand click Check Names > OK > Apply and OK
Configuring RDP (Optional)
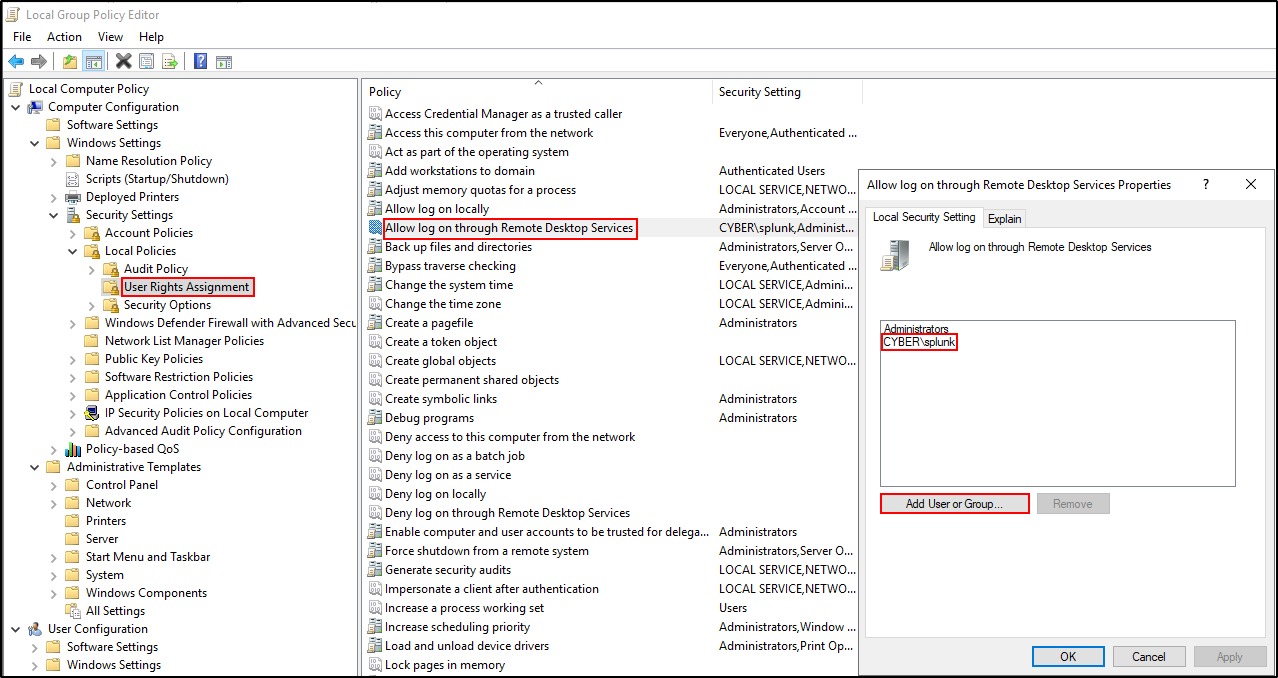
In this lab, RDP configuration was required for the splunk user to login to WS2019 host. This step is optional. Open Local Group Policy Editor by clicking Run > type gpedit.msc . In the Local Group Policy Editor, navigate to Windows Settings > Security Settings > Local Policies > User Rights Assignment > Allow log on through Remote Desktop Services. Add user splunk.
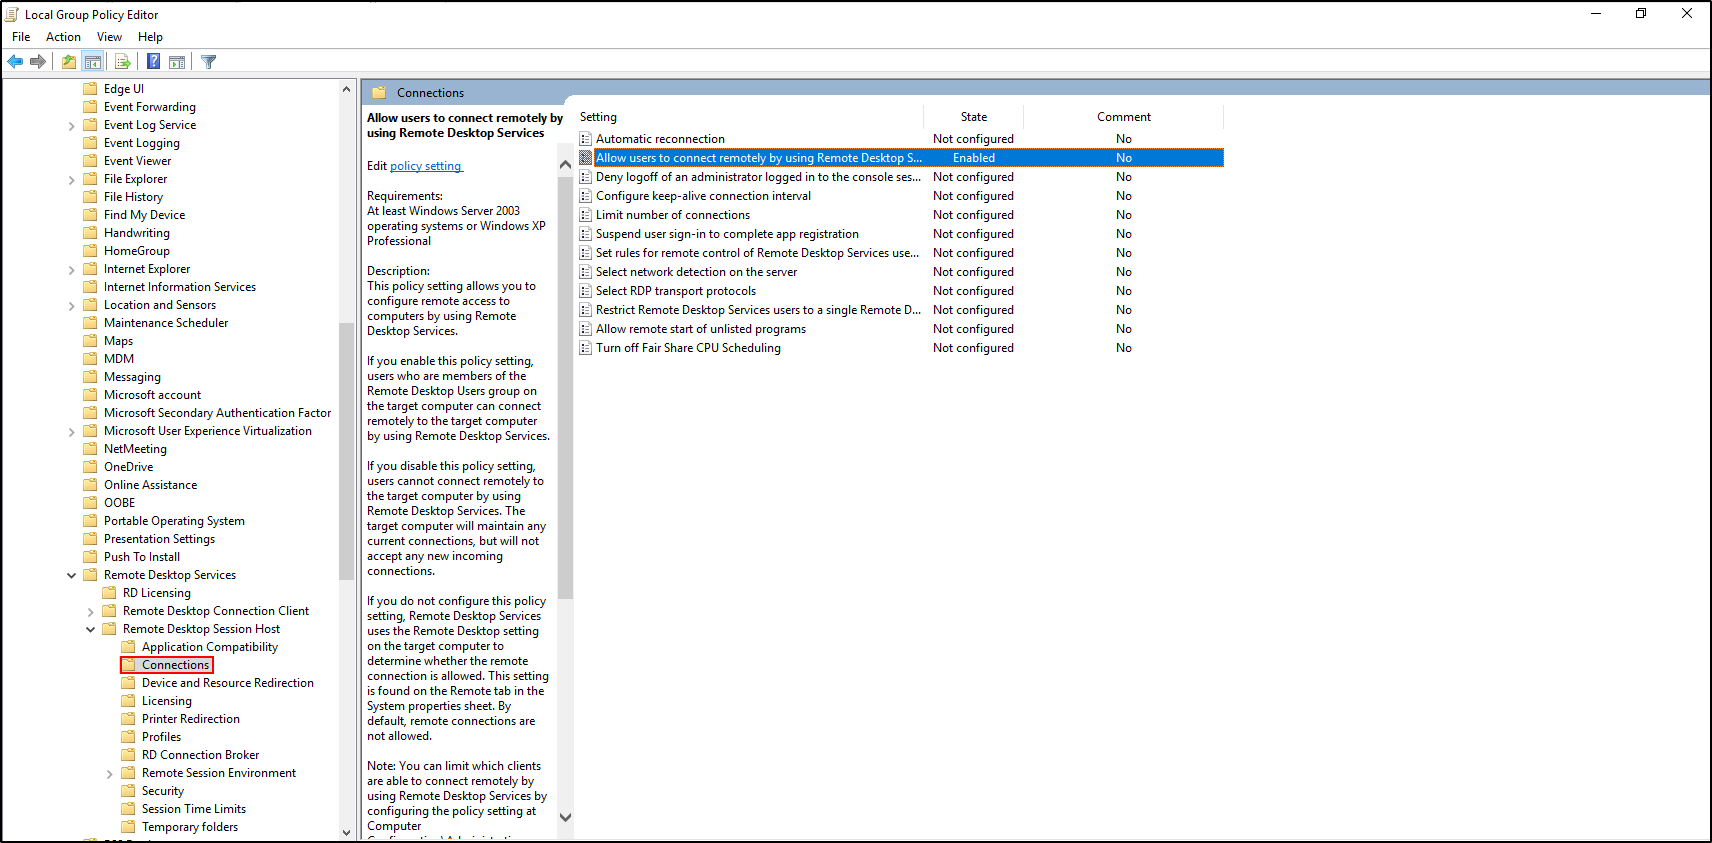
In the Local Group Policy Editor, navigate to Computer configuration > Administrative Templates > Windows Components > Remote Desktop Services > Remote Desktop Session Host > Connections > Allow users to connect remotely by using Remote Desktop Services >Enabled.
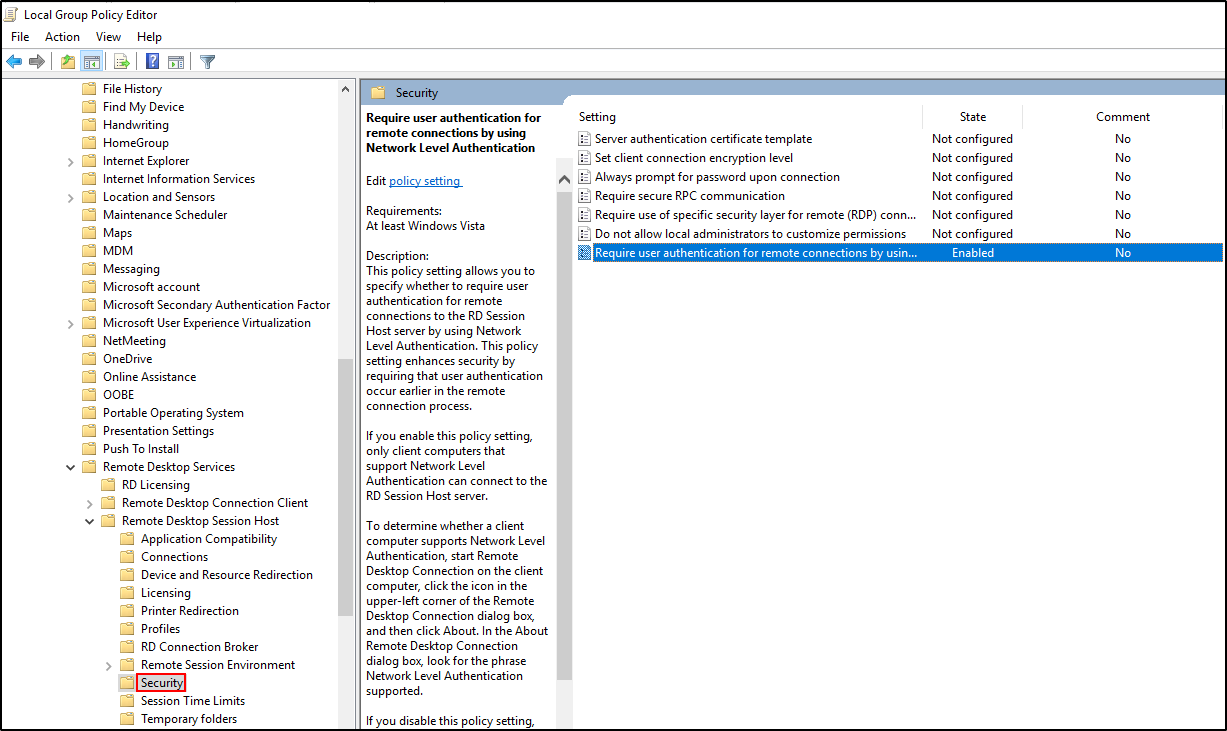
Navigate to Remote Desktop Session Host > Security > Require user authentication for remote connections by using Network Level Authentication > Enabled.
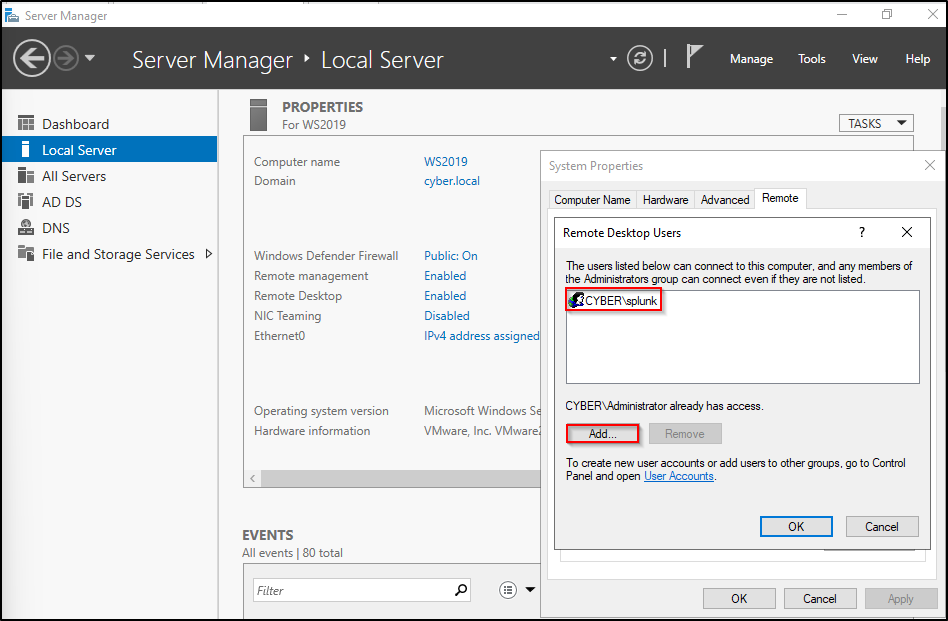
In Server Manager, go to Local Server. Make sure Remote Desktop is Enabled. Click Enabled next to Remote Desktop. Click Select Users. Add user splunk.
Enable inbound firewall rules related to Remote Desktop.
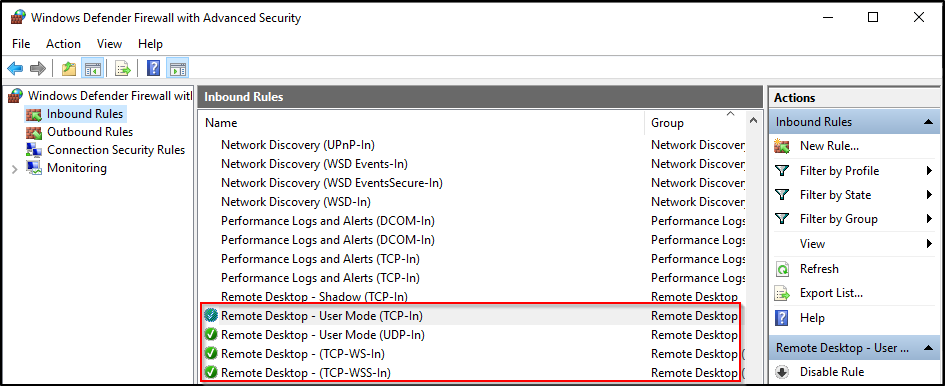
RDP into WS2019 host as the splunk user from another internal host.
Configuring Splunk UF on Windows
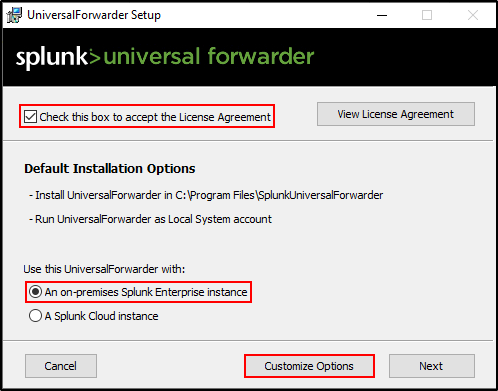
Download and transfer the Splunk Universal Forwarder (UF) (msi) for Windows. Run Universal Forwarder (msi), accept license, select on-premise Splunk Enterprise instance, and click Customize Options.
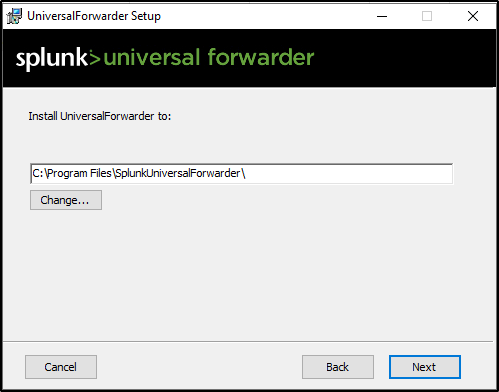
Leave Path as default and click Next
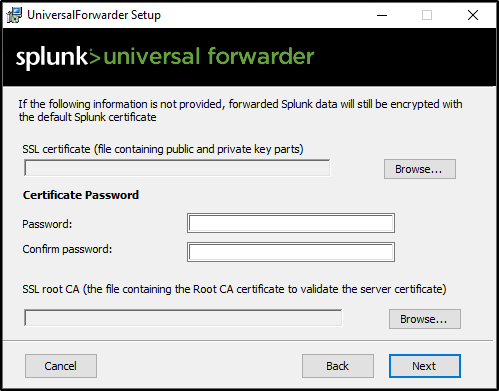
Leave Certificate Password empty and click Next
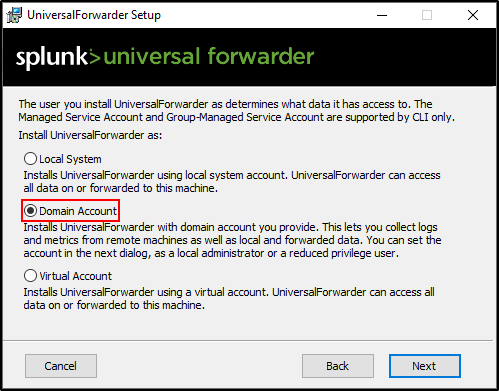
Select Domain Account.
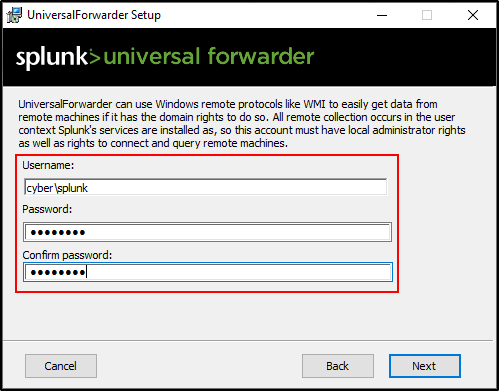
Specify domain\splunk and password for the account.
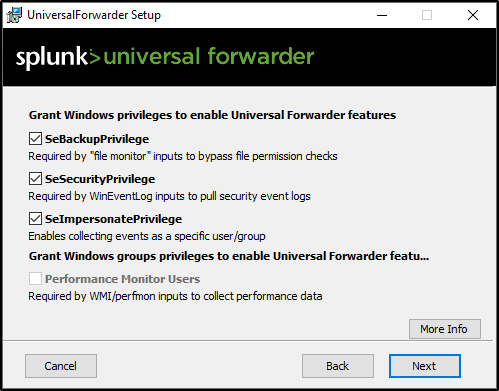
Leave permissions as default.
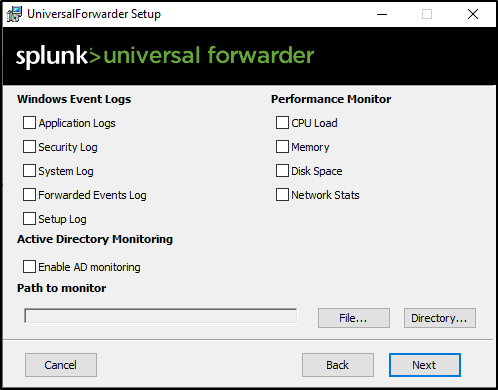
Leave everything unchecked and click Next.
Create credentials for the administrator account.
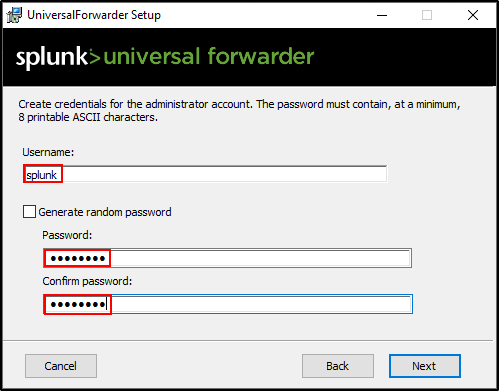
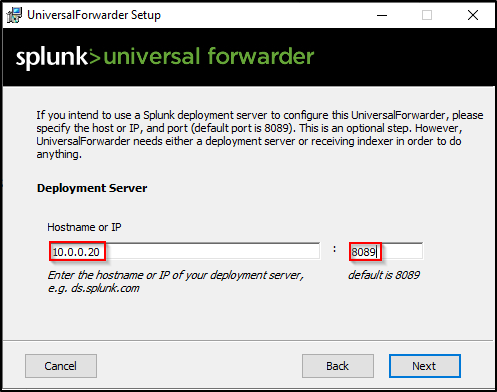
Enter IP address of Deployment Server (Splunk server) and port 8089. Note the IP address in the screenshot is different to the lab setup.
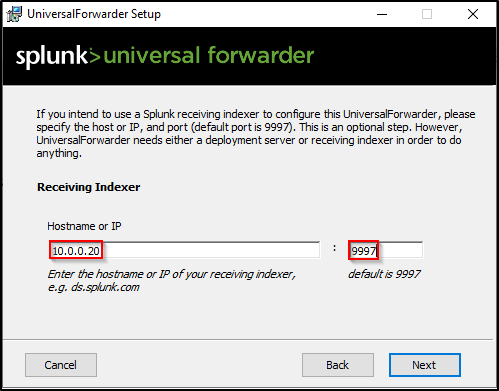
Enter IP address of Receiving Indexer (Splunk server) and port 9997.
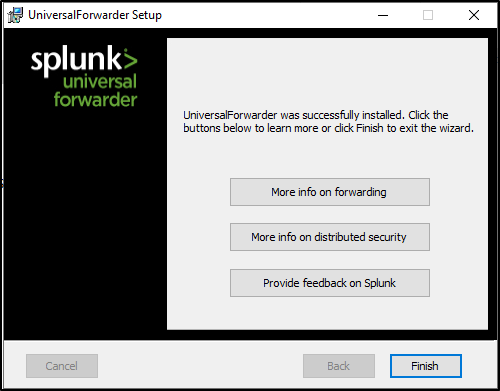
Click Install. Click Finish after install is complete.
Creating a New Outbound Firewall Rule
Navigate to Windows Defender Firewall with Advanced Security. Right-click on Outbound Rules and select New Rule. Select Program as Rule Type.
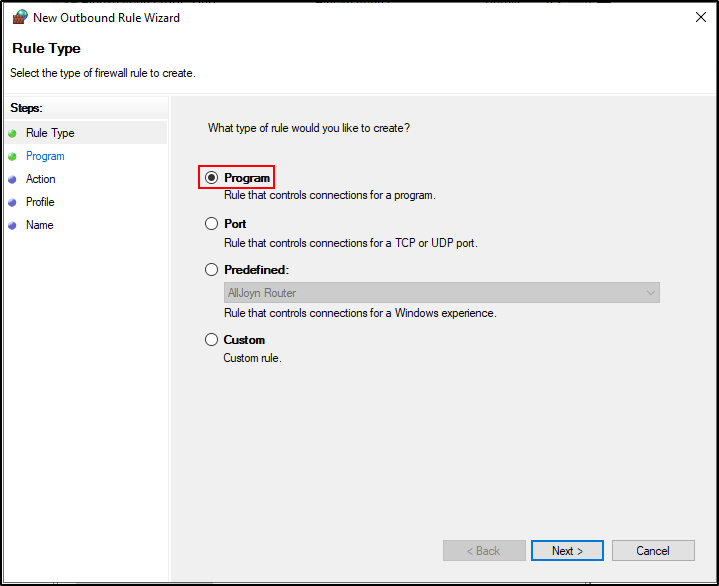
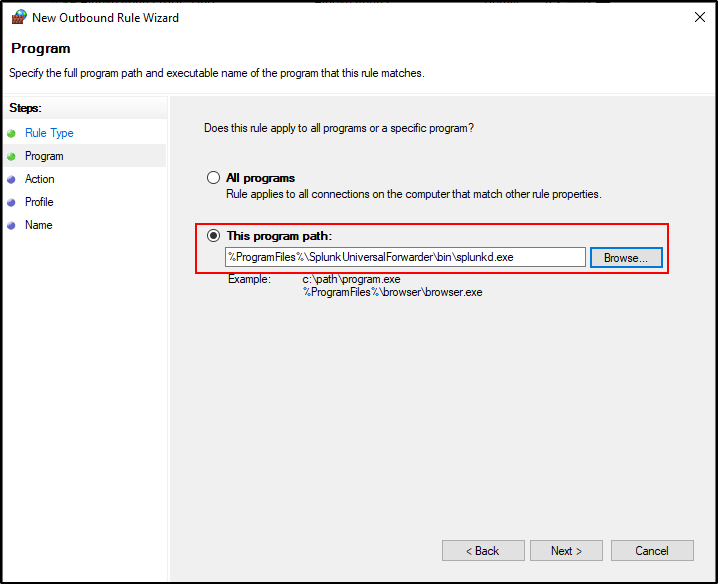
For program path, browse to C:\Program Files\SplunkUniversalForwarder\bin\splunkd.exe
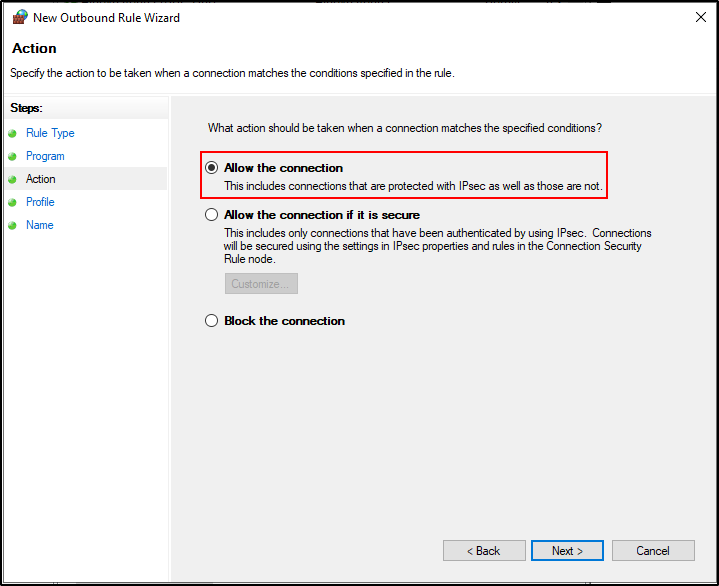
Select Allow the Connection.
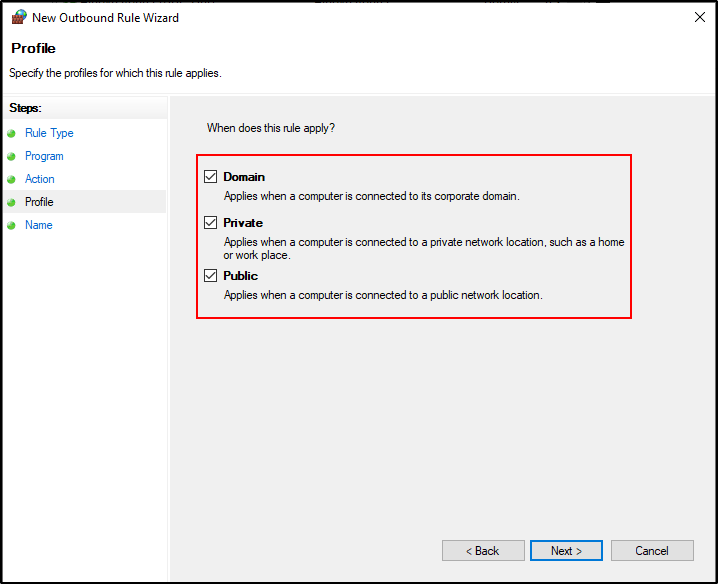
Check all boxes for Domain, Private and Public.
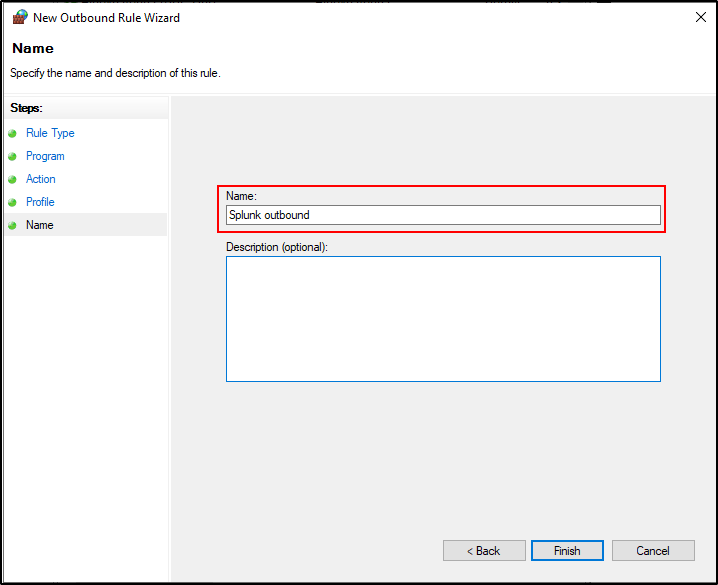
Name the rule as Splunk outbound
Verifying Agent Connection on Windows
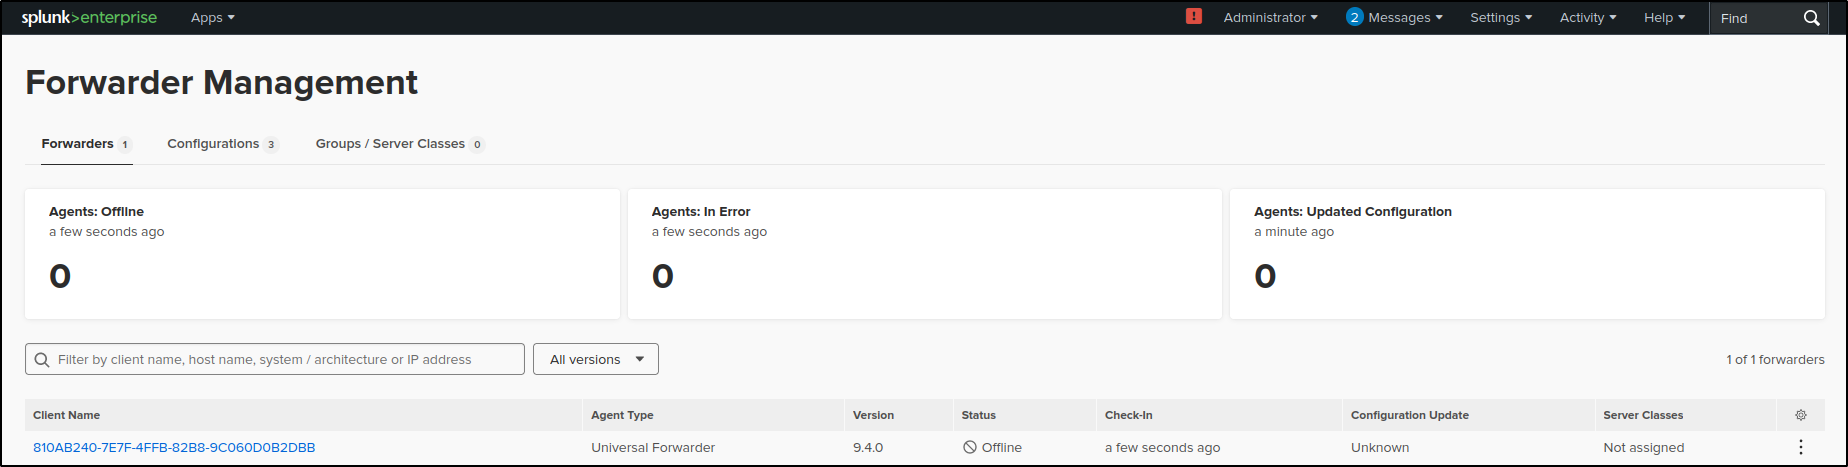
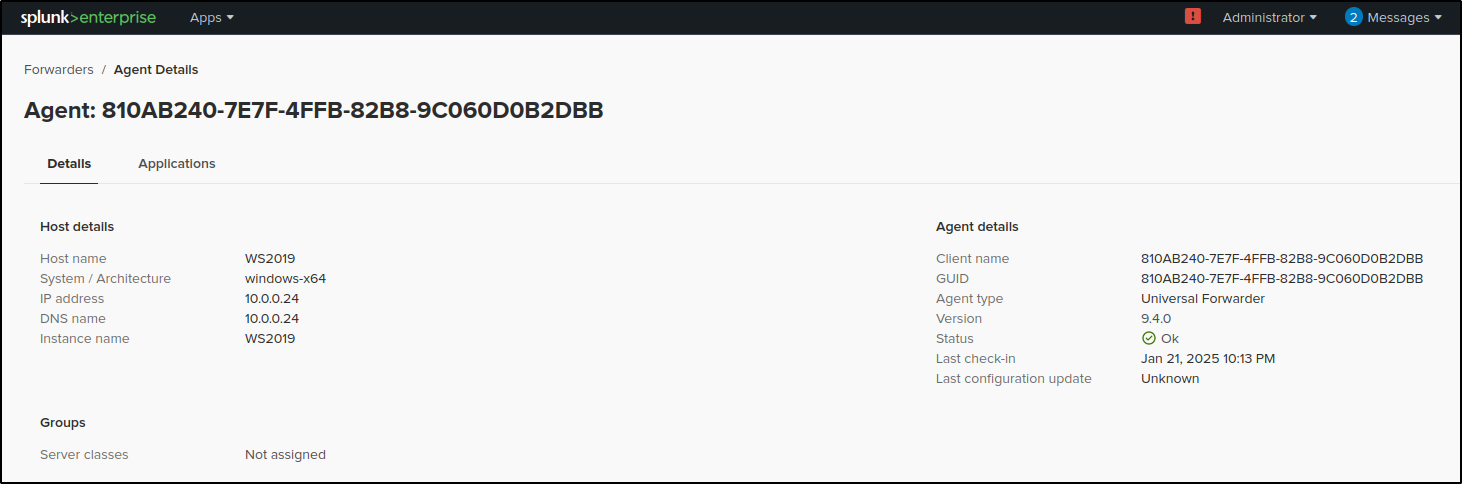
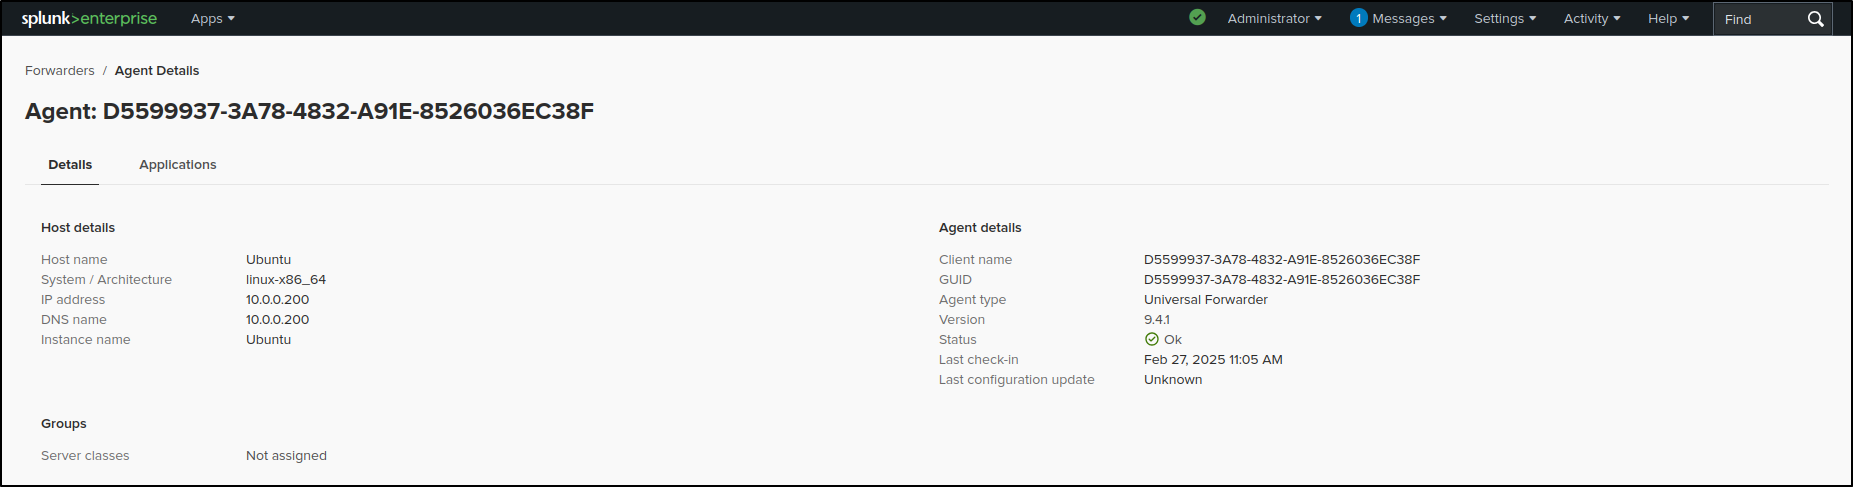
Verify that yours Windows host is connected to the Deployment Server. On the Splunk Enterprise web UI, go to Settings > Forwarder Management. You should be able to see your Windows client.
Installing Splunk UF on Linux
Download and transfer Splunk UF (tar archive) for Linux. Unpack the tar archive to /opt directory as a standard user.
Create a user called splunk and change the ownership of /opt/splunkforwarder to the splunk user.
#Example output
total 12
drwxr-xr-x  3 root   root   4096 Feb 27 11:00 .
drwxr-xr-x 23 root   root   4096 Feb  1 03:42 ..
drwxr-xr-x  9 splunk splunk 4096 Feb 21 07:30 splunkforwarder
Configuring Splunk UF on Linux
Switch to splunk user and start Splunk UF. When prompted, create admin credentials.
In the /opt/splunkforwarder/bin directory, as the splunk user, run the following command to connect to Linux client (UF) the deployment server (Splunk Enterprise).
Verify that the deployment server's IP address in deploymentclient.conf (located in /opt/splunkforwarder/etc/system/local/) is correct.
Run the following command to add the forward-server as the Splunk Enterprise. We are essentially configuring UF to send logs to the listening port of Splunk Enterprise.
Verify that the tcpout server’s IP address in outputs.conf (located in /opt/splunkforwarder/etc/system/local) is correct.
#Example output
[tcpout]
defaultGroup = default-autolb-group

[tcpout:default-autolb-group]
server = 10.0.0.100:9997

[tcpout-server://10.0.0.100:9997]
Restart Splunk Forwarder for changes to take effect.
Verifying Agent Connection on Linux
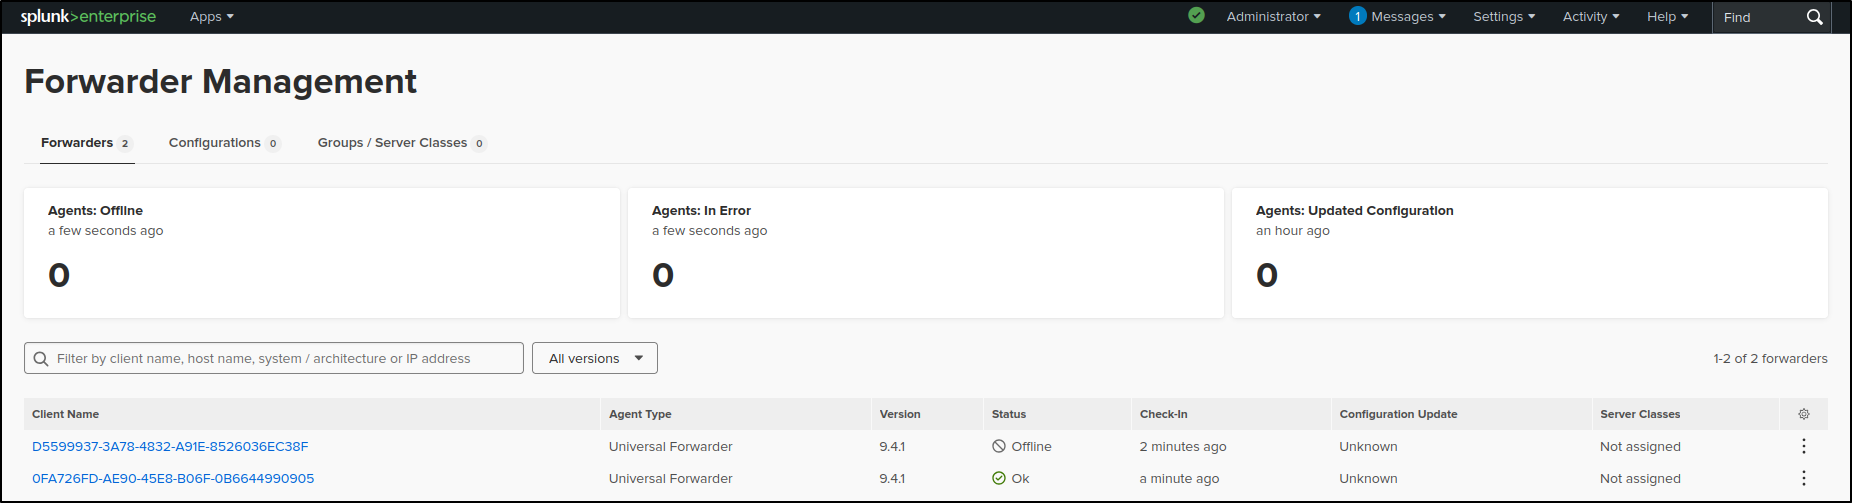
On web UI of Splunk Enterprise, go to settings, forwarder management. We should be able to see our Linux client (UF). If Linux client doesn’t appear, try refreshing the web browser or restart Splunk Enterprise.
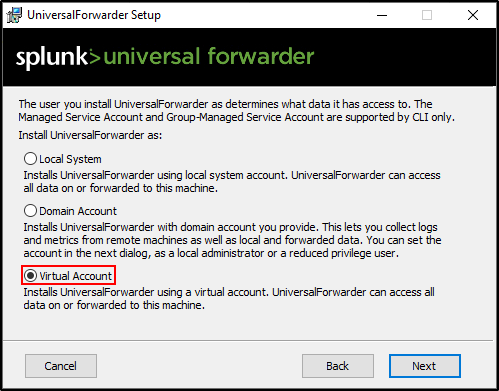
Annex: Installing Splunk UF on Windows with a Virtual Account
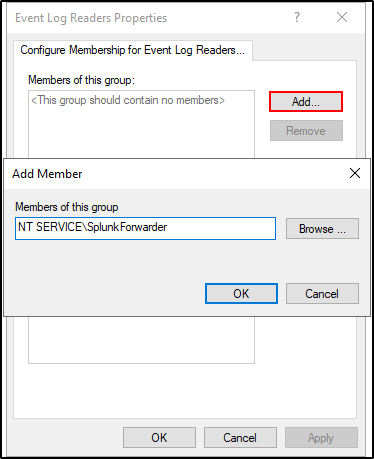
Selecting Virtual Account will create a service account called NT SERVICE\SplunkForwarder. For Sysmon Log Forwarding to work, NT SERVICE\SplunkForwarder must be assigned as a member of the Event Log Readers group through Group Policy. If your Windows host is not joined to a domain and you have technical issues with the Virtual Account, use Local System but note that this is not best security practice.
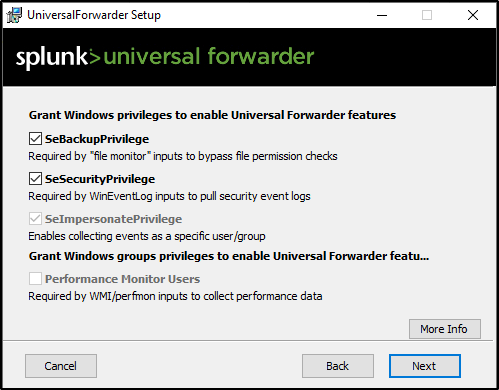
Leave the values as default and click Next
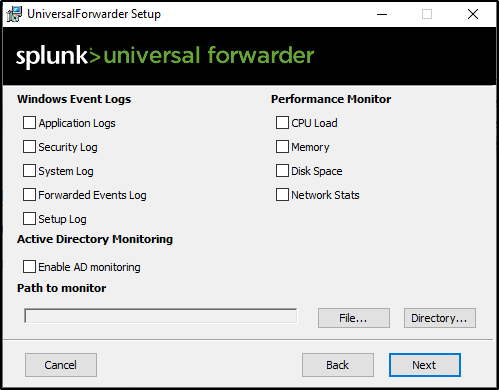
Leave the values as default and click Next (Windows Event Logs forwarding will be configured later).
Create admin credentials.
Enter IP address of your Deployment Server (Splunk server) and port 8089.
Enter IP address of your Receiving Indexer (Splunk server) and port 9997.
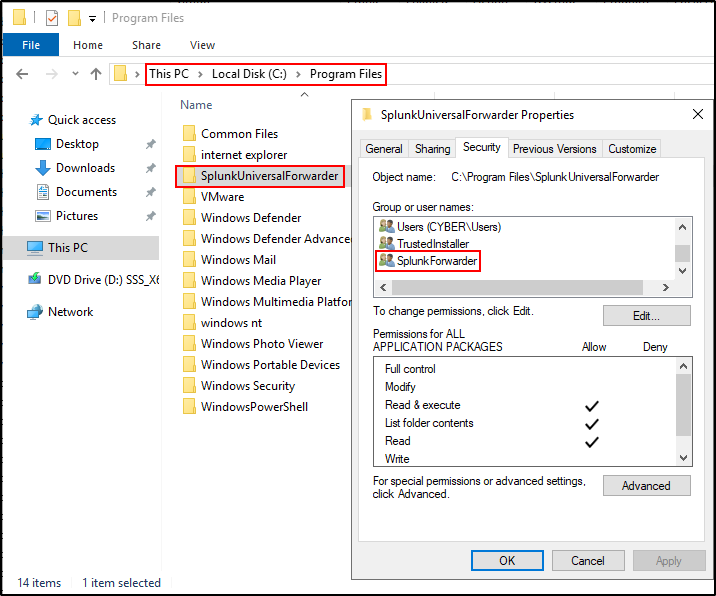
Click Next and finish install. Navigate to C:\Program Files\SplunkUniversalForwarder. Right-click and select properties. Verify that Splunk Universal Forwarder is configured to run by virtual account SplunkForwarder.
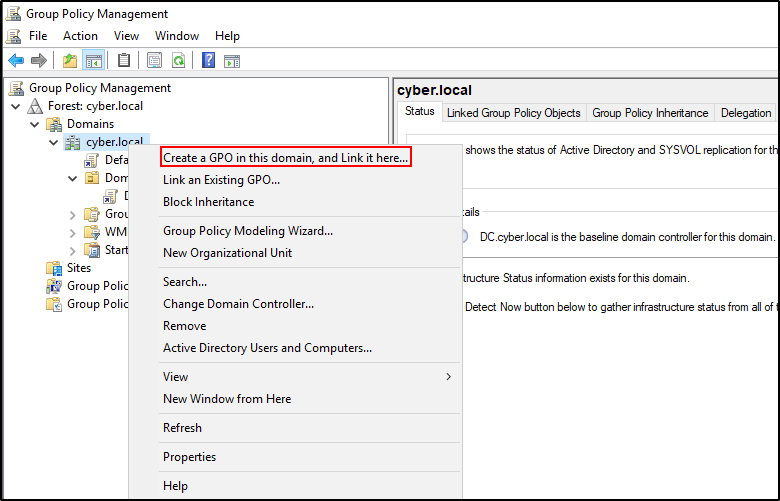
Open Group Policy Management. Right click on domain name and select Create a GPO in this domain and link it here.
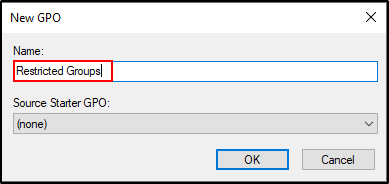
Name it as Restricted Groups.
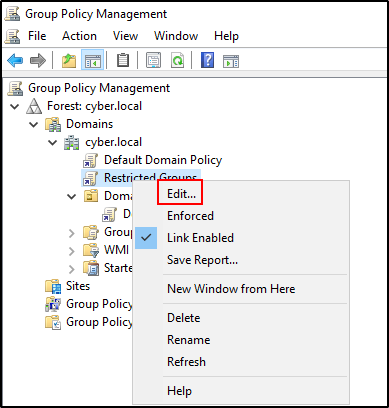
Right click on Restricted Groups and click Edit.
Navigate to Restricted Groups and Add Group.
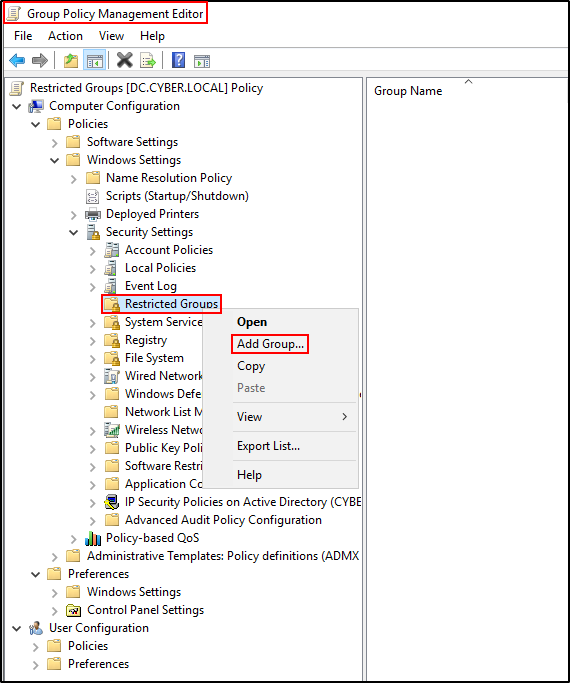
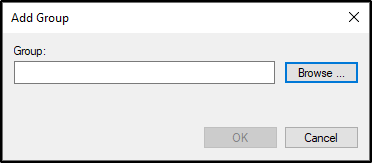
Click Browse.
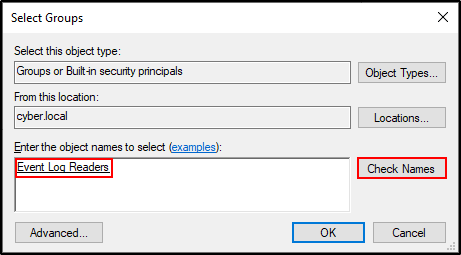
Type event log readers and click Check Names. Make sure that the names is underlined. Click OK.
Add NT SERVICE\SplunkForwarder as a member of this group. Click OK. Click Apply and OK.
Verify the configuration.
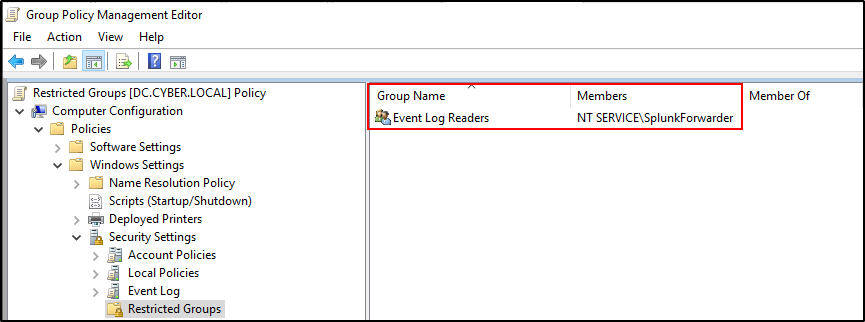
On Command Prompt as Administrator run the following command to update Group Policy:
#Example output
C:\Users\Administrator>gpupdate /force
Updating policy...

Computer Policy update has completed successfully.
User Policy update has completed successfully.
Restart Splunk UF. If Sysmon logs are not being ingested by Splunk, check the Channel Access setting for Sysmon. It is likely that SplunkForwarder has not been added to Channel Access. See the Splunk Community Sysmon ingestion troubleshooting discussion for additional context.
Get SecurityIdentifier(sid) of SplunkForwarder by running this PowerShell script.
$user = [System.Security.Principal.NTAccount]"NT SERVICE\SplunkForwarder"
$sid = $user.Translate([System.Security.Principal.SecurityIdentifier])
Write-Output $sid.Value
Add SplunkForwarder to Channel Access by running the command below. Add your sid of SplunkForwarder
wevtutil sl "Microsoft-Windows-Sysmon/Operational" /ca:"O:BAG:SYD:(A;;0x2;;;S-1-15-2-1)(A;;0x2;;;S-1-5-80-972488765-139171986-783781252-3188962990-3730692313)(A;;0xf0007;;;SY)(A;;0x7;;;BA)(A;;0x1;;;BO)(A;;0x1;;;SO)(A;;0x1;;;S-1-5-32-573)"
Restart Splunk UF.